These No-Bake Chocolate Peanut Butter Oatmeal Cups are a personal go-to for a healthier but still delicious dessert that is packed with protein, healthy fat and takes just a few minutes of effort to make. Plus these are gluten-free and dairy-free.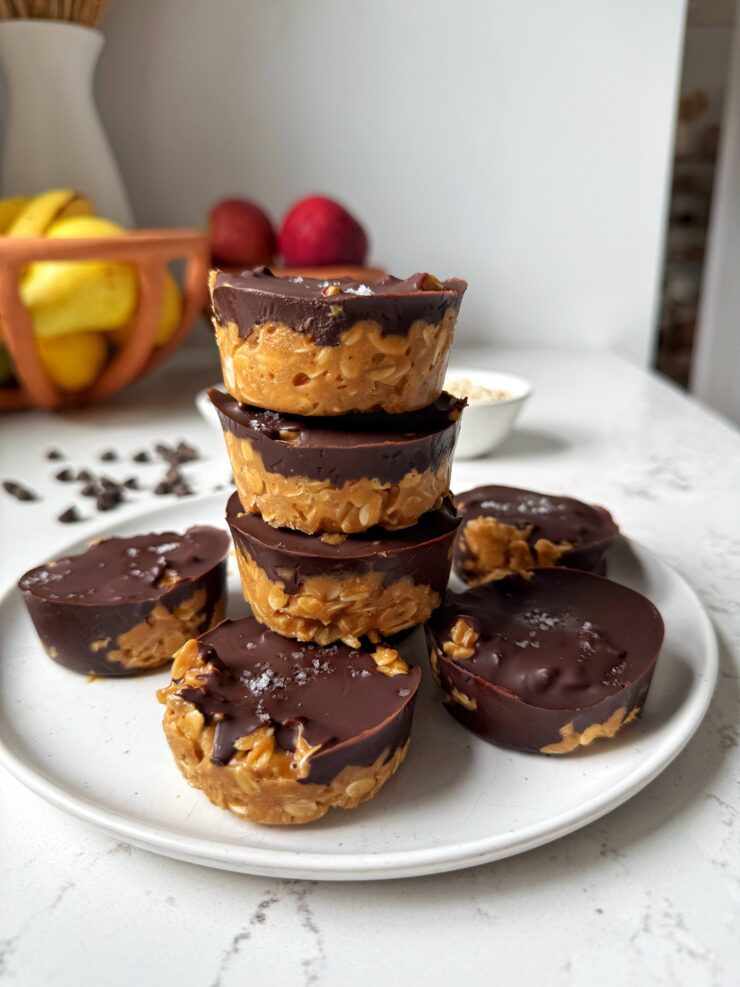
If you’ve been around here for a while, you know my obsession with chocolate and peanut butter runs deep. Whether it’s a batch of peanut butter brownie cookies, chocolate chip peanut butter bars, or a spoonful of peanut butter straight from the jar (you know you’ve done it too), there’s something about this combo that just never fails. These Chocolate Peanut Butter Oatmeal Cups are the ultimate easy snack or dessert that you can keep stashed in your fridge or freezer for that moment when your sweet tooth hits – and trust me, that moment will come.
They’re rich, chewy, slightly salty, and made with simple, wholesome ingredients like rolled oats, peanut butter, maple syrup, and coconut oil. Think of them as a cross between a chocolate peanut butter cup and a no-bake oatmeal bar – with the best of both worlds in one bite. They’re gluten-free, dairy-free if you’d like, and come together in less than 20 minutes.
This is one of those recipes I find myself making again and again because everyone in my family loves them – especially my boys. They grab one from the freezer after school, I snack on them with a cup of coffee, and my husband sneaks one (or two) after dinner. So yes, consider this your next staple snack recipe.
Why You’ll Love These Chocolate Peanut Butter Oatmeal Cups:
These cups are everything you want in a treat – easy to make, freezer-friendly, and completely irresistible. Here’s why they’ve earned a permanent spot in my freezer drawer:
-
Simple ingredients: Only seven ingredients, all pantry staples.
-
No baking required: Just mix, melt, layer, and chill.
-
Naturally gluten-free: Perfect for anyone avoiding gluten (just make sure your oats are certified gluten-free).
-
Customizable: Swap peanut butter for almond, cashew, or sunflower seed butter.
-
Freezer-friendly: They last for weeks in the freezer – although good luck keeping them that long.
-
Balanced sweetness: The maple syrup adds just enough natural sweetness without being overpowering.
Whether you’re craving a midday pick-me-up or need a make-ahead snack for the week, these chocolate peanut butter oatmeal cups deliver on flavor, texture, and convenience.
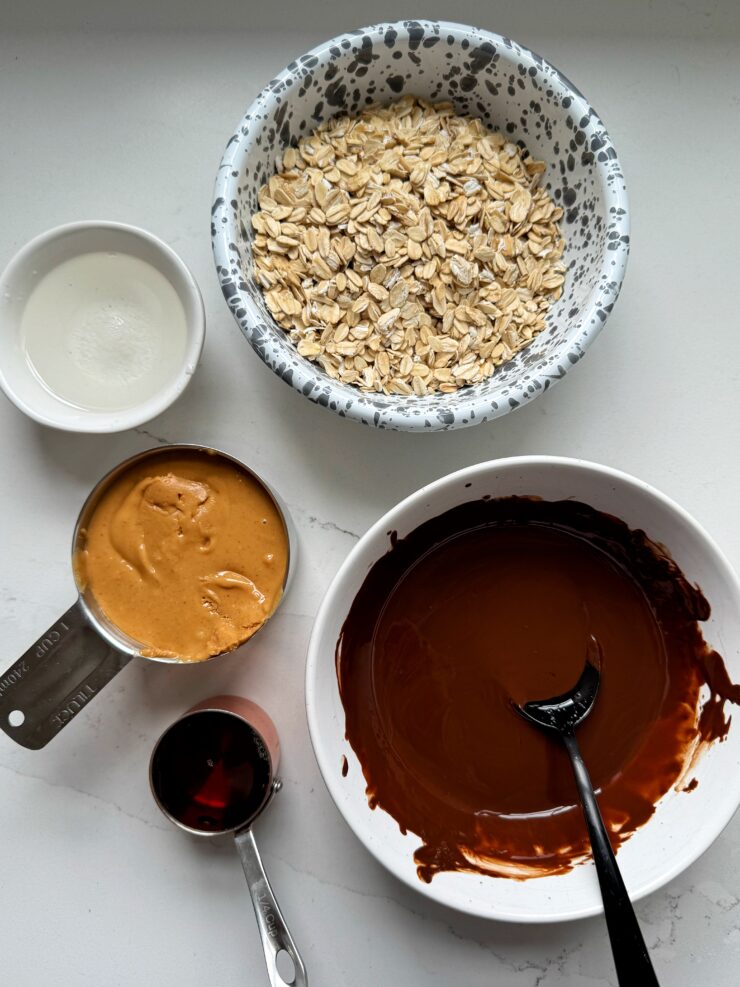
Ingredients You’ll Need:
Here’s what goes into each layer of these heavenly cups:
Base Layer:
-
Creamy peanut butter – The star of the show. Choose a natural peanut butter with minimal ingredients (just peanuts and salt).
-
Maple syrup (or honey) – Adds sweetness and helps the oats stick together.
-
Melted coconut oil – Keeps the mixture moist and adds a subtle richness. Use avocado oil if you need a swap.
-
Old-fashioned rolled oats – For that chewy, hearty texture. Use gluten-free if needed.
-
Vanilla extract – Adds warmth and enhances the peanut butter flavor.
-
Pinch of salt – Balances out the sweetness perfectly.
Chocolate Topping:
-
Semi-sweet chocolate chips – Use whatever chocolate you love most (dark chocolate works great too).
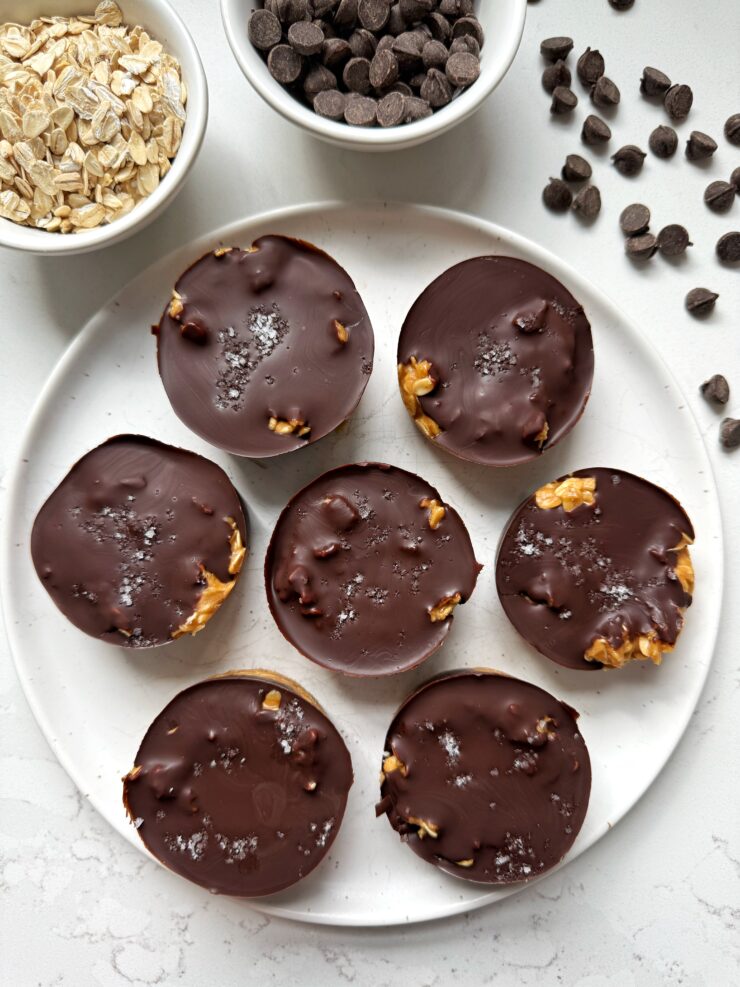
Optional: Flaky sea salt to sprinkle on top — it makes the flavor pop and gives that fancy, bakery-style look.
How to Make Chocolate Peanut Butter Oatmeal Cups:
This recipe couldn’t be easier – it’s the kind of thing you can whip up during nap time, before school pick-up, or even at 9 p.m. when you’re craving something sweet but don’t want to bake cookies.
1. Prepare the Muffin Tin
Line a standard 12-cup muffin tin with paper or silicone liners and set aside. Silicone liners work best because they make removing the cups super easy once they’ve chilled.
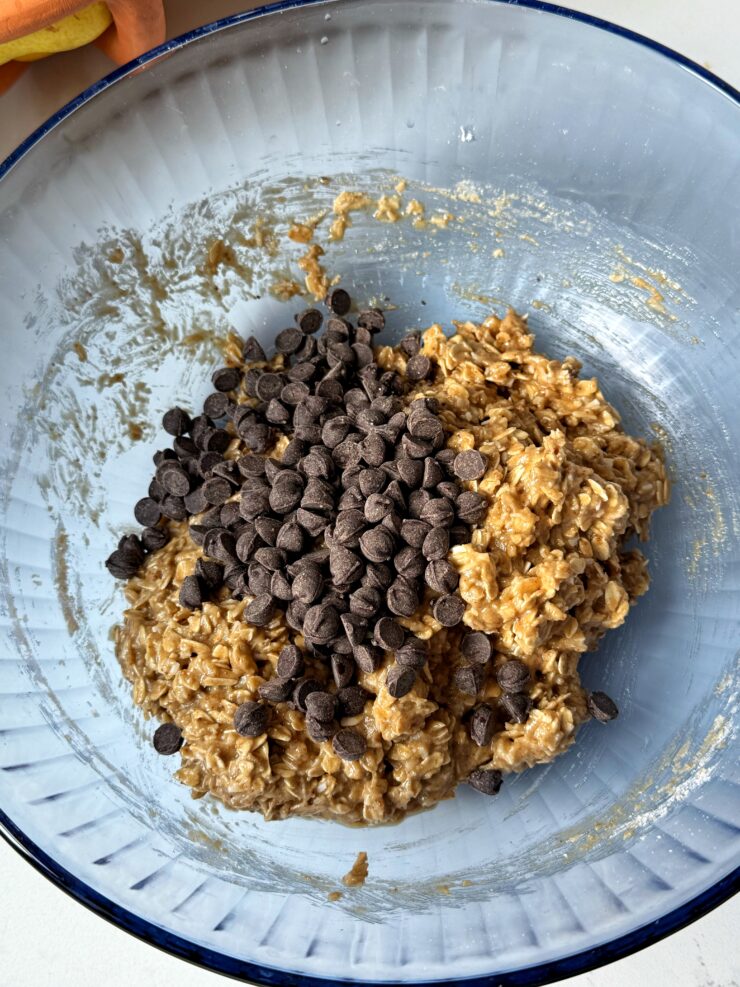
2. Mix the Base Layer
In a medium bowl, stir together the peanut butter, maple syrup, melted coconut oil, vanilla extract, and a pinch of salt until smooth and creamy. Add in the oats and stir until everything is evenly coated. The mixture should be sticky and hold together when pressed.
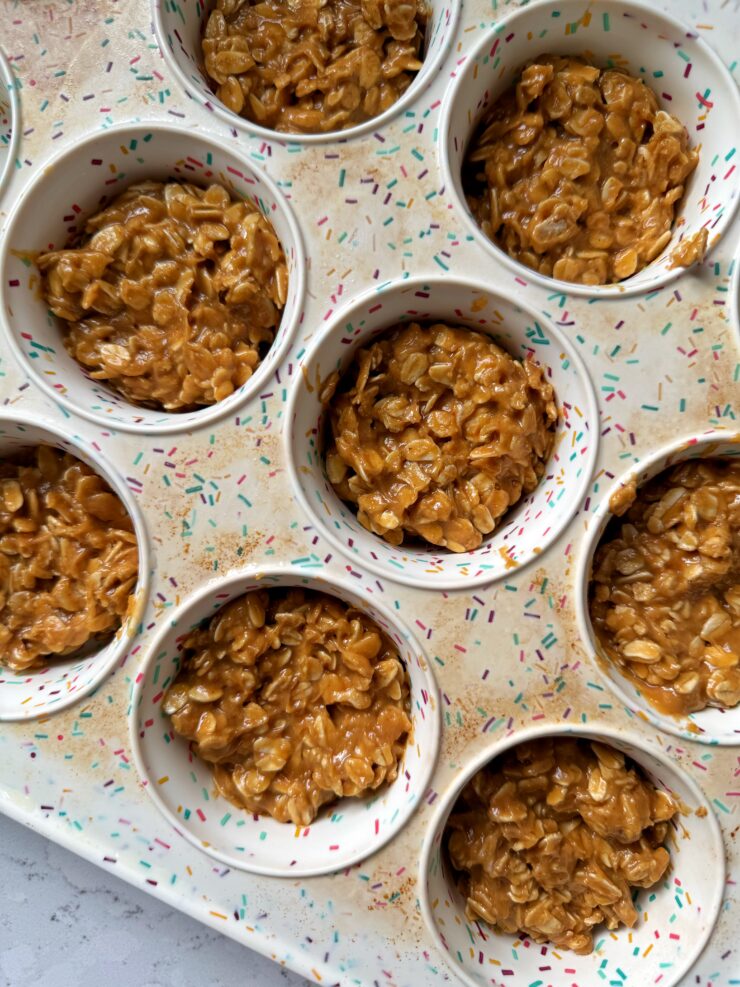
3. Form the Cups
Scoop about 2 tablespoons of the oat mixture into each muffin liner. Use the back of a spoon to press it down firmly into an even layer. This helps create that satisfying chewy base that holds the chocolate perfectly. Once all 12 cups are formed, transfer the muffin tin to the freezer for about 10 minutes to firm up while you make the topping.
4. Make the Chocolate Topping
In a microwave-safe bowl, combine the chocolate chips and coconut oil. Heat in 30-second intervals, stirring in between, until melted and smooth. If you prefer, melt it on the stovetop using a double boiler to prevent overheating the chocolate.
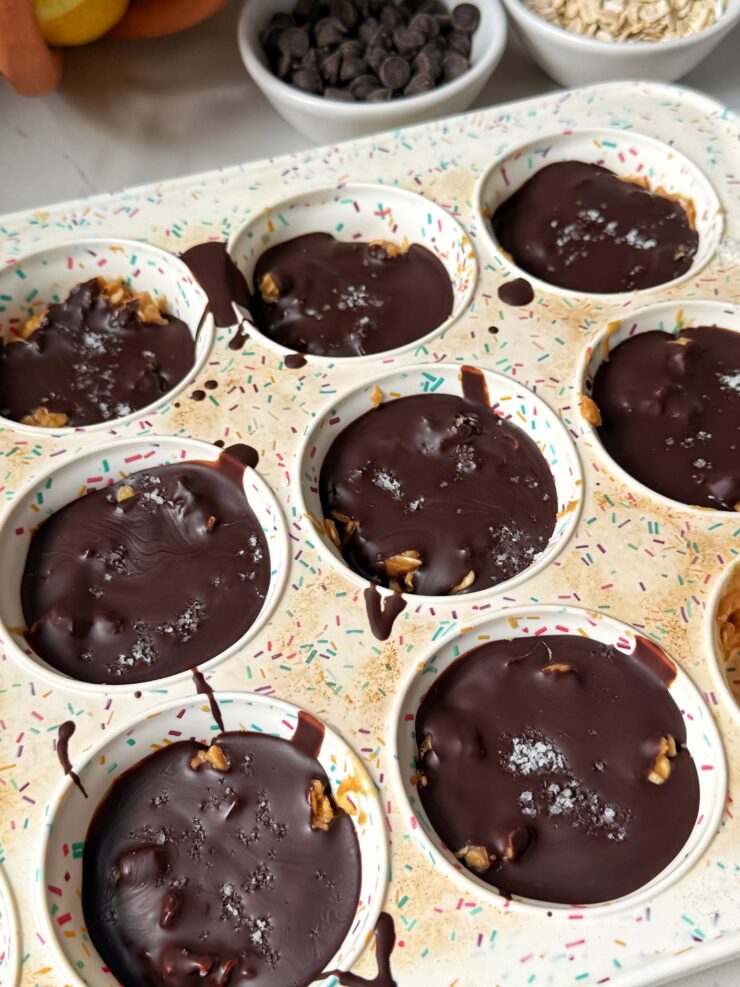
5. Top the Cups
Remove the chilled oat cups from the freezer. Spoon about 1 tablespoon of the melted chocolate over each one, spreading it evenly to cover the surface.
6. Add Salt and Chill
If using, sprinkle a small pinch of flaky sea salt on top of each cup. This step isn’t required, but I highly recommend it for that sweet-salty contrast. Return the muffin tin to the freezer for another 15–20 minutes, or until the chocolate is fully set.
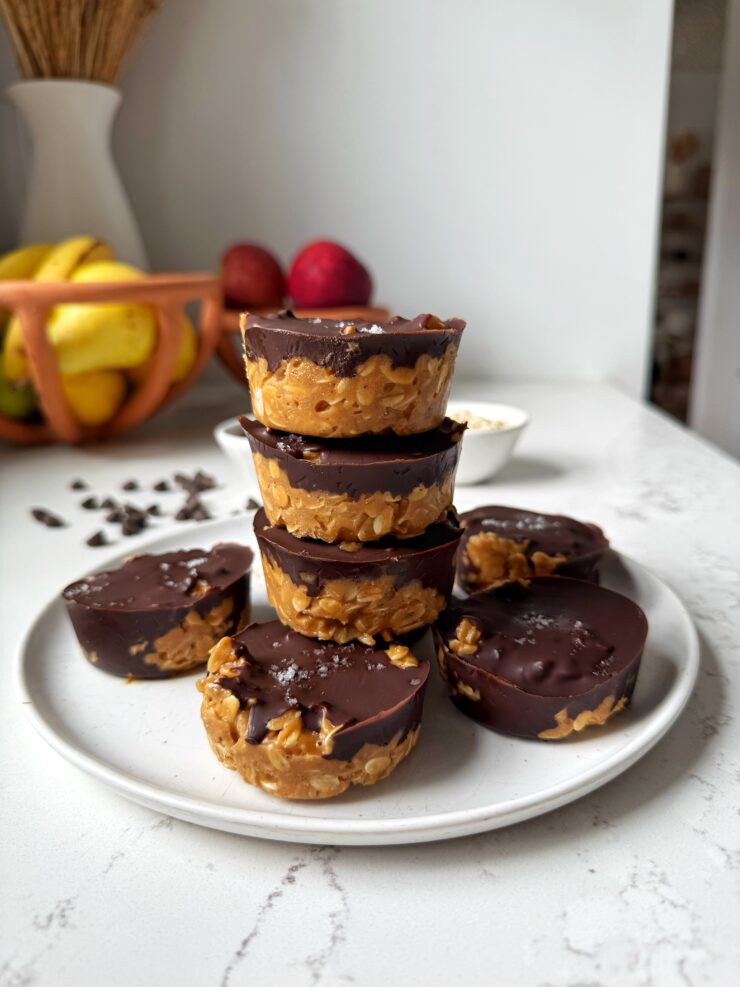
Once set, pop them out of the liners and store them in an airtight container in the fridge or freezer.
Tips for Perfect Chocolate Peanut Butter Oatmeal Cups:
-
Use runny peanut butter: Thick peanut butter can make the base too dry. If yours is stiff, stir in a teaspoon of coconut oil to loosen it up before mixing.
-
Don’t skip chilling: Freezing helps the layers set properly and makes them easier to handle.
-
Adjust sweetness: You can reduce or increase the maple syrup slightly based on how sweet you like things.
-
Make them mini: Use a mini muffin tin for bite-sized cups — perfect for little hands or quick snacks.
-
Add crunch: Mix in chopped peanuts, puffed rice, or cacao nibs to the oat layer for extra texture.
-
Try other nut butters: Almond, cashew, or sunflower seed butter all work beautifully here.
How to Store:
You can keep these chocolate peanut butter oatmeal cups:
-
In the fridge: Store in an airtight container for up to 2 weeks.
-
In the freezer: Freeze for up to 3 months. Let them sit at room temperature for 5–10 minutes before enjoying if they’re too firm.
Honestly, they taste incredible straight from the freezer – like a cold, chewy peanut butter cup.
How to Make Them Healthier (and Still Delicious!)
This recipe already uses better-for-you ingredients, but you can tweak it further if you’d like:
-
Lower sugar: Use stevia-sweetened chocolate chips or reduce the maple syrup slightly.
-
Add protein: Stir a scoop of your favorite protein powder into the base for an energy-boosting snack.
-
Add fiber: Mix in a tablespoon of chia seeds or flaxseed meal.
-
Make them vegan: Use dairy-free chocolate chips and maple syrup instead of honey.
These are the kinds of swaps that let you make this recipe fit your goals – whether you want a post-workout snack or a guilt-free dessert.
The Perfect Anytime Snack:
These cups are honestly the best kind of snack. They satisfy that chocolate craving without feeling too heavy, they’re packed with good fats and fiber from the oats and peanut butter, and they keep you feeling full and energized.
They’re also perfect for meal prep – I like to make a batch on Sunday night and keep them in the fridge for the week. I’ll toss one into a lunchbox, grab one when I’m heading out the door, or sneak one after dinner with a sprinkle of extra salt on top.
And if you’re hosting or heading to a get-together, these make an easy dessert to bring along. You don’t even need to worry about serving utensils or cutting anything — just peel off the liner and enjoy.
Recipe Variations:
Once you’ve made these chocolate peanut butter oatmeal cups, you’ll see how easy it is to change things up. Here are a few ideas to try next time:
-
Chocolate Almond Butter Cups: Swap the peanut butter for almond butter and add a drizzle of melted white chocolate on top.
-
Salted Caramel Oat Cups: Add a thin layer of date caramel between the oats and chocolate.
-
Mocha Oat Cups: Stir a teaspoon of instant espresso powder into the melted chocolate for a coffee kick.
-
Crunchy Oat Cups: Mix crushed pretzels or chopped nuts into the oat base.
-
Berry Oat Cups: Press a few fresh raspberries or freeze-dried strawberries into the chocolate layer before chilling.
Each variation keeps that same delicious base but adds a fun twist – you can’t go wrong.
Why This Recipe Works:
The magic of these cups is in their simplicity and texture. The chewy oat layer pairs perfectly with the smooth, rich chocolate, and the peanut butter brings everything together. The coconut oil helps both layers set beautifully in the fridge or freezer, so you get that satisfying bite every time – firm enough to hold together, but soft enough to melt in your mouth.
They also strike that perfect balance of indulgent yet nourishing – the kind of treat that doesn’t leave you feeling sluggish or guilty. It’s truly the ideal “healthy dessert” that doesn’t taste healthy at all.
If you’ve been looking for an easy, no-bake recipe that hits all the right notes — sweet, salty, chewy, chocolatey — these Chocolate Peanut Butter Oatmeal Cups are it. They’re everything you love about a peanut butter cup, with the bonus of wholesome oats and simple, nourishing ingredients.
Whether you’re making them for yourself, your kids, or to share with friends, they’ll quickly become one of those recipes you make on repeat. Because let’s be honest — when chocolate and peanut butter are involved, there’s no such thing as too many batches.
A Few Other Easy Desserts to Make:
3-ingredient Chocolate Peanut Butter Crunch Bars
Peanut Butter Cup Cottage Cheese Truffles
Easy S’mores Granola Bars (vegan + no-bake)
5-ingredient Homemade Almond Joy Candy Bars
PrintNo-Bake Chocolate Peanut Butter Oatmeal Cups
These No-Bake Chocolate Peanut Butter Oatmeal Cups are a personal go-to for a healthier but still delicious dessert that is packed with protein, healthy fat and takes just a few minutes of effort to make. Plus these are gluten-free and dairy-free.
- Prep Time: 10 mins
- Total Time: 50 mins
Ingredients
Base layer:
- 1 cup creamy peanut butter
- 1/4 cup pure maple syrup (or honey)
- 1/4 cup melted coconut oil (use avocado oil if you need a swap)
- 1 1/2 cups old-fashioned rolled oats (gluten-free if needed)
- 1/2 teaspoon vanilla extract
- Pinch of salt
Chocolate topping:
- 1 cup semi-sweet chocolate chips (or dark chocolate, if preferred)
- 1 tablespoon coconut oil
Instructions
- Prepare the Muffin Tin: Line a standard 12-cup muffin tin with paper or silicone liners and set aside. Silicone liners work best because they make removing the cups super easy once they’ve chilled.
- Mix the Base Layer: In a medium bowl, stir together the peanut butter, maple syrup, melted coconut oil, vanilla extract, and a pinch of salt until smooth and creamy. Add in the oats and stir until everything is evenly coated. The mixture should be sticky and hold together when pressed.
- Form the Cups: Scoop about 2 tablespoons of the oat mixture into each muffin liner. Use the back of a spoon to press it down firmly into an even layer. This helps create that satisfying chewy base that holds the chocolate perfectly. Once all 12 cups are formed, transfer the muffin tin to the freezer for about 10 minutes to firm up while you make the topping.
- Make the Chocolate Topping: In a microwave-safe bowl, combine the chocolate chips and coconut oil. Heat in 30-second intervals, stirring in between, until melted and smooth. If you prefer, melt it on the stovetop using a double boiler to prevent overheating the chocolate.
- Top the Cups: Remove the chilled oat cups from the freezer. Spoon about 1 tablespoon of the melted chocolate over each one, spreading it evenly to cover the surface.
- Add Salt and Chill: If using, sprinkle a small pinch of flaky sea salt on top of each cup. This step isn’t required, but I highly recommend it for that sweet-salty contrast. Return the muffin tin to the freezer for another 15–20 minutes, or until the chocolate is fully set.
Notes
*Keep fridge for 5 days or freezer for 2 months

 Share this recipe
Joseph Wesley Verrett Jr
Why do you try a little bit of chopped dry fruit in the mix. Thank you!
Rachel Mansfield
go for it !! love that.
Heather
Hi Rachel would you know the nutritional information is for your cups?
Rachel Mansfield
we are going to be adding nutritional facts soon!
Erin
Can a different oil be used? We have SEVERE coconut allergies!!!
Rachel Mansfield
avocado oil works for sure!
Fran
Weight Watchers Points would be a great addition
Rachel Mansfield
Hi Fran, we are adding nutrition facts to each recipe. From there you should be able to map out the points. xo
Chrissy
Looks amazing
Rachel Mansfield
thank you so much
Kaitlin
Holy moly these are so tasty! Made these for my family tonight and they are so delicious! I did add about a cup of rice crispies too for an extra crunch! Thank you for sharing these amazing recipes!
Rebecca
What can I use in place of coconut oil???
Rachel Mansfield
avocado oil
Barb
Can you use another kind of oil in place of the coconut oil?
Rachel Mansfield
avocado oil
Mar
Hi. These look delish but I don’t have coconut oil & don’t want to buy it just for 1 recipe. Is there a substitute for the coconut oil you can recommend? Something to use in more day to day recipes plz. Thank you- very anxious to try these if not for that😋
Rachel Mansfield
avocado oil
Jennifer F
These are EPIC! I made with some peanut butter on top too.
Rachel Mansfield
LOVE IT!!
Jill
You say to add peanuts for crunch, could you just use crunchy peanut butter?
Rachel Mansfield
sure! that sounds delicious.
C Swift
Can the oil be reduced or left out altogether or something other than oil used to reduce fat?
Rachel Mansfield
you can likely reduce it but make sure your PB is really drippy and not too thick!
Emily
Looks amazing! Can you swap Greek yogurt for the coconut oil to cut fat and increase protein?
Rachel Mansfield
Hmm that is a really good idea! I would think so?! I can try next week but if you do let me know. Maybe that will be a new recipe here inspired by you! 🙂
Joe
How many carbs do they have?
Erica
I’m assuming these are with processed peanut butter like Jif. If using natural peanut butter – would you omit the coconut/avocado oil? Logically it sounds like it would be too runny with the additional oil.
Thoughts? Suggestions?
Rachel Mansfield
I use organic peanut butter – I don’t use processed nut butters. As you probably know, it depends on the brand for how drippy it is. If yours is drippy feel free to omit oil.
Drew
So delicious 😋
I substituted the peanut butter for almond butter and used oat milk dark chocolate chips they turned so yummy. Definitely be making these again! 🤗
Rachel Mansfield
LOVE IT!!!
Jackie
tasty but need nutrition info
Andrea
Seems absolutely delicious, I’m going to try out in my kitchen!
Thank you very much for sharing with us those amazing and delicious recipes!
Rachel Mansfield
i hope you love!!
Jennifer
These are absolutely delicious!! I used my mini silicone muffin tray and they are such a great treat to have ready in the freezer!
Brandi
Definitely going to try these. What are your thoughts on agave as a sweetener?
Rachel Mansfield
i prefer honey or maple syrup but if you use it and love it, it’ll work!!