These Chocolate Peanut Butter Rice Krispie Balls are an ultimate dream for chocolate peanut butter lovers! Made with 4 ingredients and ready in 30 minutes, these are a must-make and they are gluten-free and dairy-free!
If you’re looking for a quick and easy sweet treat that satisfies your chocolate and peanut butter cravings, these Chocolate Peanut Butter Rice Krispie Balls are exactly what you need. They’re made with just four simple ingredients, require no baking, and come together in minutes. Plus, they offer the perfect balance of crunch, sweetness, and indulgence in every bite.
Whether you need a simple dessert, an afternoon pick-me-up, or a fun treat to make with kids, these no-bake chocolate peanut butter rice krispie balls will be a hit. Let’s dive into the recipe!
Why You’ll Love These Chocolate Peanut Butter Rice Krispie Balls
-
Minimal Ingredients – Only four pantry staples are needed to whip up these delicious treats.
-
No Baking Required – Perfect for hot days when you don’t want to turn on the oven.
-
Naturally Sweetened – Maple syrup gives these a touch of natural sweetness without refined sugar.
-
Crispy and Creamy Texture – The combination of chocolate, peanut butter, and crispy cereal creates an irresistible texture.
-
Make-Ahead Friendly – These store well in the fridge, making them great for meal prep or snacks throughout the week.
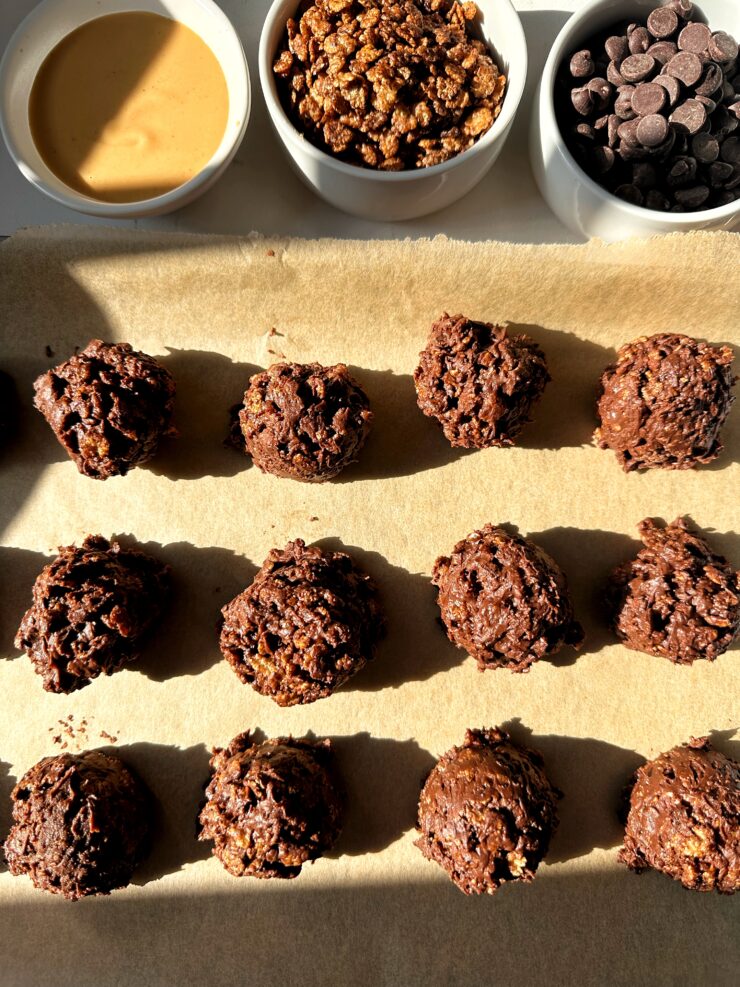
Ingredients You’ll Need
- Dark chocolate or semi-sweet chocolate chips – Dark chocolate provides a richer taste, while semi-sweet keeps things a bit sweeter.
- Creamy peanut butter – Adds a creamy, nutty flavor and helps bind the ingredients together.
- Maple syrup – A natural sweetener that enhances the overall taste.
- Rice krispie cereal – I used this one!

How to Make Chocolate Peanut Butter Rice Krispie Balls
- In a microwave-safe bowl, combine the chocolate chips and peanut butter and microwave in 30-second intervals, stirring after each until the mixture is completely melted and smooth
- Stir in the maple syrup until smooth then fold in the cereal until all of the pieces are evenly coated with the chocolate mixture
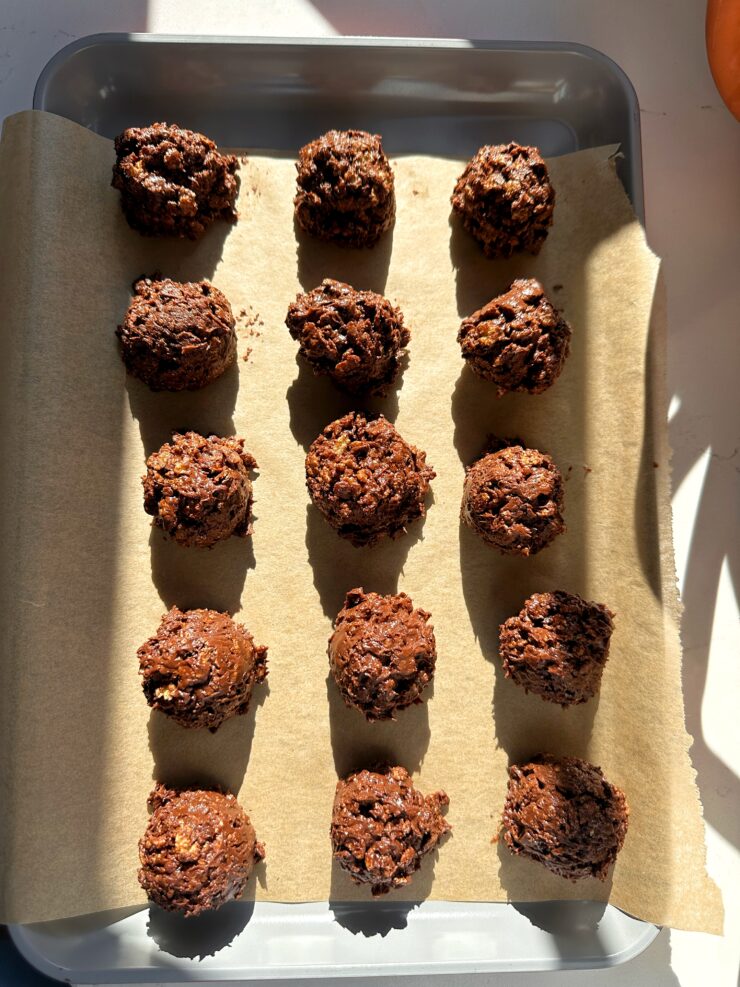
- Using a cookie scooper or spoon, form small balls and place onto parchment-lined baking sheet
- Chill in the fridge for 20-30 minutes or until firm
- Enjoy chilled!

Storage Tips
-
Refrigerator: Store these treats in an airtight container in the fridge for up to one week.
-
Freezer: If you want to keep them for longer, freeze them in a sealed container for up to 2 months. Simply thaw for a few minutes at room temperature before eating.
Variations and Add-Ins
Want to switch things up? Here are some fun variations to try:
-
Add a Sprinkle of Sea Salt – A pinch of flaky sea salt on top before chilling enhances the sweet and salty flavors.
-
Use Different Nut Butters – Swap peanut butter for almond butter, cashew butter, or sunflower seed butter for an allergy-friendly version.
-
Mix in Mini Chocolate Chips – For extra chocolate goodness, fold in a handful of mini chocolate chips before shaping into balls.
-
Drizzle with Melted Chocolate – After chilling, drizzle with extra melted chocolate for an extra indulgent touch.
-
Incorporate Chopped Nuts – Adding chopped peanuts, almonds, or pecans provides extra crunch and a boost of healthy fats.
Perfect for Any Occasion
These Chocolate Peanut Butter Rice Krispie Balls are perfect for:
-
A quick dessert when you’re short on time.
-
A healthy snack that satisfies sweet cravings.
-
Lunchbox treats for kids and adults alike.
-
Holiday dessert platters or edible gifts for friends and family.
-
A pre/post-workout snack with a balance of carbs and healthy fats.
FAQs
- Can I use honey instead of maple syrup? Yes! Honey can be used as a substitute for maple syrup. It will make the mixture slightly thicker and add a different depth of sweetness.
- Can I make these vegan? Yes! Just be sure to use dairy-free chocolate chips to keep this recipe completely vegan.
- What if my mixture is too sticky to roll into balls? If the mixture is too sticky, try chilling it in the fridge for 5-10 minutes before rolling. Lightly greasing your hands with coconut oil can also help prevent sticking.
- How do I make them gluten-free? Most rice krispie cereals contain malt flavoring, which is not gluten-free. Look for a certified gluten-free crispy rice cereal to make this recipe suitable for a gluten-free diet.
- Can I double the recipe? Absolutely! If you need more servings, simply double all the ingredients and follow the same instructions.
These Chocolate Peanut Butter Rice Krispie Balls are the ultimate no-bake treat that everyone will love. With their perfect combination of chocolate, peanut butter, and crispy cereal, they make a delightful snack or dessert for any occasion. Plus, they’re easy to make, naturally sweetened, and customizable to suit your taste preferences.
Try making a batch today and let us know how they turn out! Enjoy!

A few other chocolate peanut butter recipe to try:
3-ingredient Chocolate Peanut Butter Crunch Bars
Vegan Chocolate Peanut Butter Cereal Bars
Easy 4-ingredient Chocolate Peanut Butter Fudge
The BEST Gluten-free Twix Bars!
PrintChocolate Peanut Butter Rice Krispie Balls (gluten-free + vegan)
These Chocolate Peanut Butter Rice Krispie Balls are an ultimate dream for chocolate peanut butter lovers! Made with 4 ingredients and ready in 30 minutes, these are a must-make and they are gluten-free and dairy-free!
- Prep Time: 5 mins
- Total Time: 30 mins
Yield: Makes 12 balls 1x
Ingredients
- 1 cup dark chocolate or semi-sweet chocolate chips
- 1/2 cup creamy peanut butter
- 1/3 cup maple syrup
- 2 1/2 cups krispie cereal (I used this one!)
Instructions
- In a microwave-safe bowl, combine the chocolate chips and peanut butter and microwave in 30-second intervals, stirring after each until the mixture is completely melted and smooth
- Stir in the maple syrup until smooth then fold in the cereal until all of the pieces are evenly coated with the chocolate mixture
- Using a cookie scooper or spoon, form small balls and place onto parchment-lined baking sheet
- Chill in the fridge for 20-30 minutes or until firm
- Enjoy chilled!
Notes
*Store in fridge for 5 days or freezer for 2 months

 Share this recipe
Anne
So so good! My 2 year old and 37 yr old (husband) loved them!
Rachel
YAYYY