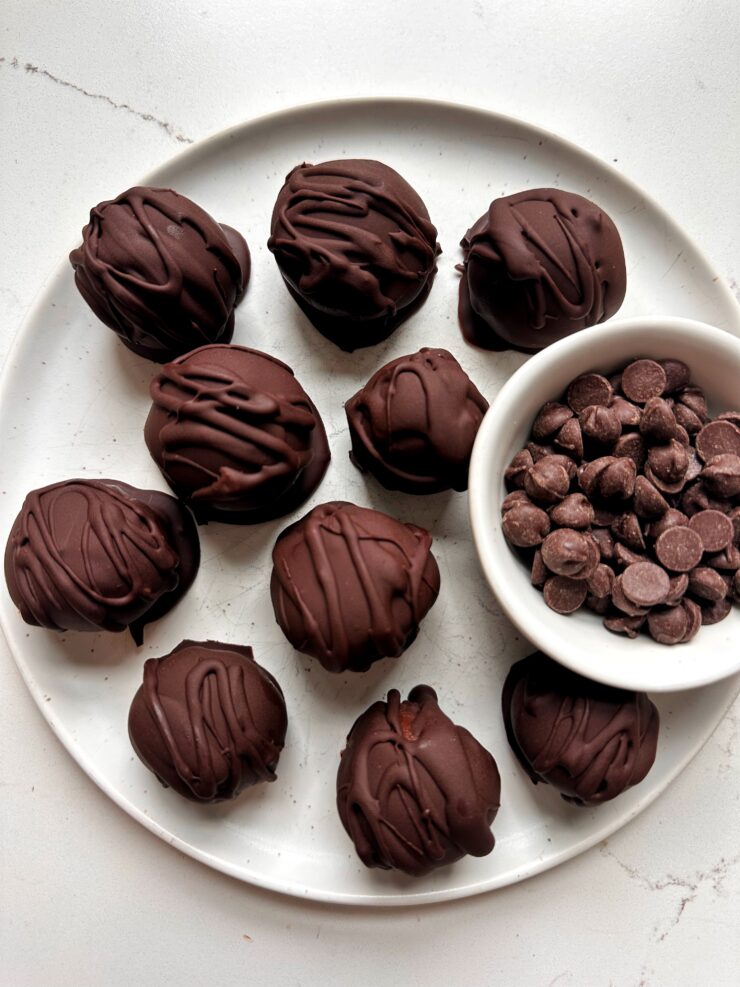
These Brownie Batter Cottage Cheese Truffles are a dreamy delicious sweet snack made with simple ingredients. You’d never know these are gluten-free, higher in protein and made with cottage cheese.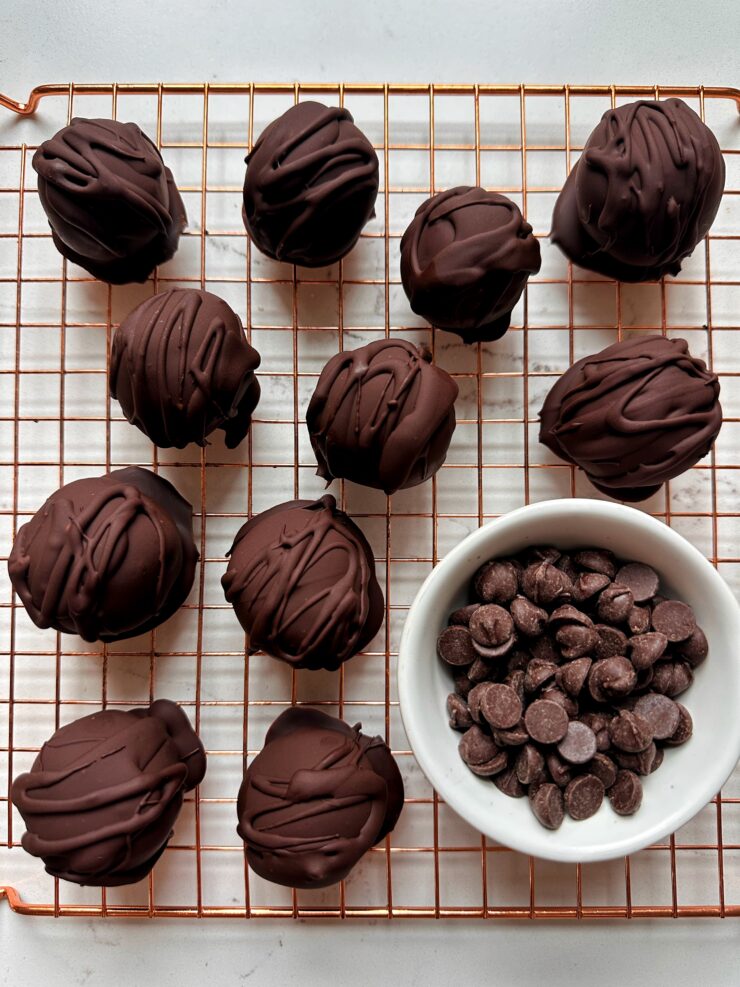
Okay friends—this is not a drill. These brownie batter cottage cheese truffles are officially one of the best no-bake snacks to ever come out of my kitchen. Think rich, chocolatey, creamy, perfectly sweetened bites that are secretly packed with protein and take barely 10 minutes to whip up.
They’re like little chocolate hugs rolled up into fudgy truffle form—and the fact that they’re made with cottage cheesemight just blow your mind in the best way possible.
If you’ve been around here long enough, you know I’m always looking for ways to sneak in more nourishment without compromising flavor. And these truffles? They deliver big time. Let’s break them down and then get you making a batch (or two) ASAP.
Why You’ll Love These Truffles
This is the type of snack I keep on hand for busy weeks, post-school pickup meltdowns, pre-dinner hanger, or late-night chocolate cravings. Here’s what makes them a staple in our house:
-
Nutrient-packed: You’re getting healthy fats, protein, and fiber all in one bite.
-
No refined sugar: Sweetened naturally with maple syrup.
-
Easy AF: Toss it all in a food processor and blend. That’s it.
-
No baking required: No oven, no mess. Just a little chill time and some melty chocolate magic.
-
Freezer-friendly: They stash beautifully in the freezer and taste just as amazing straight out of it.
Let’s Talk Ingredients
Here’s everything you need to make this magic happen:
- Almond flour – This gives the truffles that perfect soft, doughy texture without any grains. It’s also rich in healthy fats and keeps the truffles gluten-free and blood sugar friendly. If you only have oat flour or another nut flour on hand, that works too—just be aware the texture might shift slightly.
- Creamy peanut butter – This brings so much flavor and richness to the truffles. I recommend a natural peanut butter made with just peanuts and salt. If you need a peanut-free option, feel free to sub in almond butter or sunflower seed butter.
- Cacao powder – Unrefined and packed with antioxidants, cacao powder gives us that intense chocolate flavor. You can use regular cocoa powder if that’s what you have—both will work!
- Cottage cheese – Yes, you read that right. Cottage cheese in truffles! This is where the secret magic happens. It adds creaminess, protein, and moisture without overpowering the flavor. You won’t taste it at all, I promise. I like using a small curd, whole milk cottage cheese, but feel free to use whatever kind you prefer.
- Maple syrup – Our natural sweetener of choice. It brings just the right amount of sweetness and helps bind everything together. You could also use honey if that’s what you have on hand.
- Vanilla extract – A must for that classic brownie batter flavor. It rounds everything out and makes the truffles taste like a fudgy dessert dream.
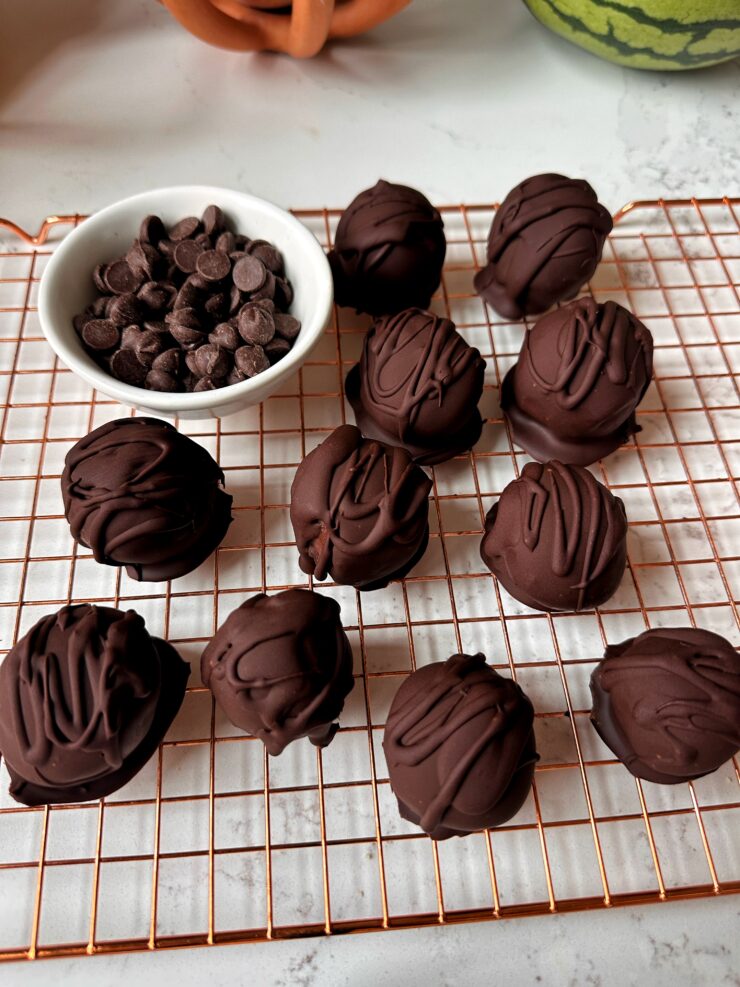
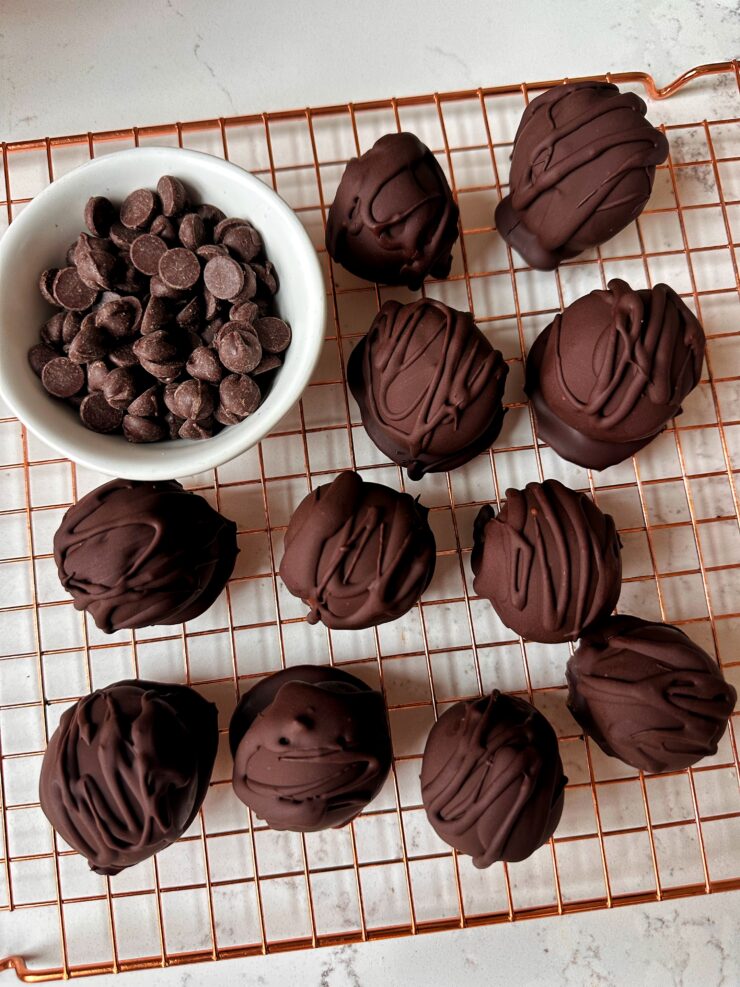
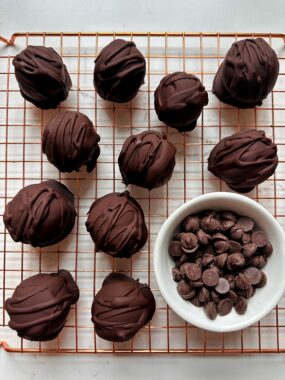
- Dark chocolate chips (or your chocolate of choice) – This is for that glorious melted chocolate coating. I use 70% dark chocolate chips, but you can use semi-sweet, milk, or even a dairy-free brand if needed.
How to Make Brownie Batter Cottage Cheese Truffles
You ready? This process could not be easier.
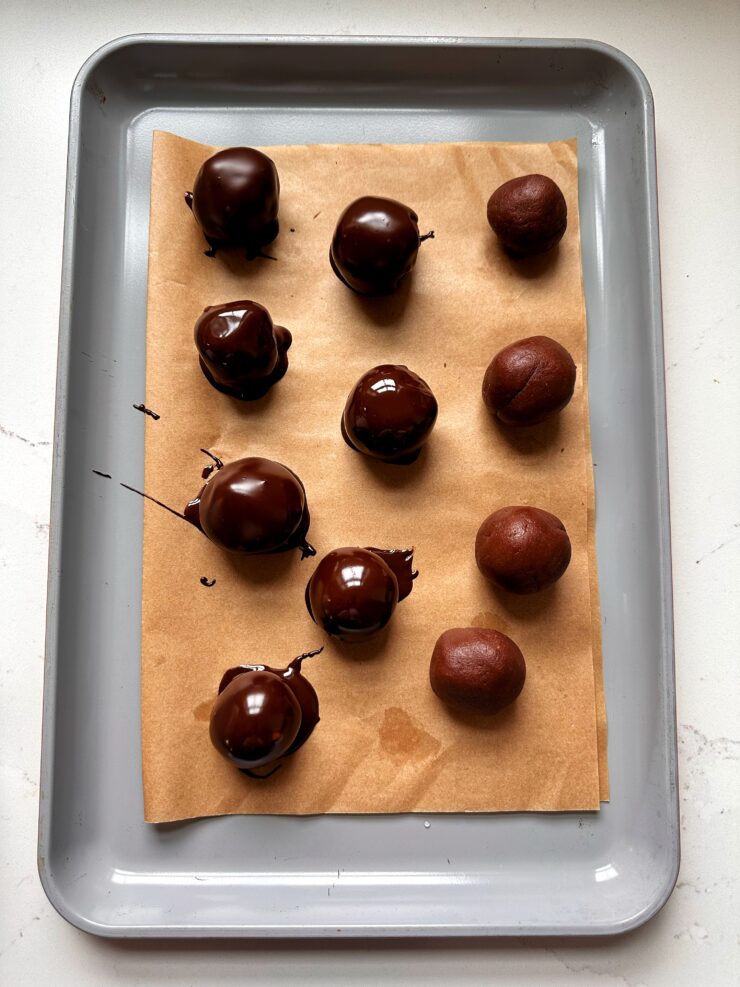
- Add the almond flour, peanut butter, cacao powder, cottage cheese, maple syrup, and vanilla to your food processor. Blend everything up until a smooth, creamy dough forms. It should easily roll into balls – if it feels too sticky, add another spoonful of almond flour. If it’s too dry, a drizzle of maple syrup or peanut butter will fix it right up.
- Use a small cookie scoop or tablespoon to form the dough into balls and place them onto a parchment-lined baking sheet or plate.
- Pop them in the freezer for 10 minutes to firm up a bit before coating in chocolate
- While the truffles are chilling, melt your chocolate chips. You can do this in the microwave in 30-second intervals (stirring in between), or over a double boiler on the stove. Add a tiny splash of coconut oil if you want extra glossy chocolate!
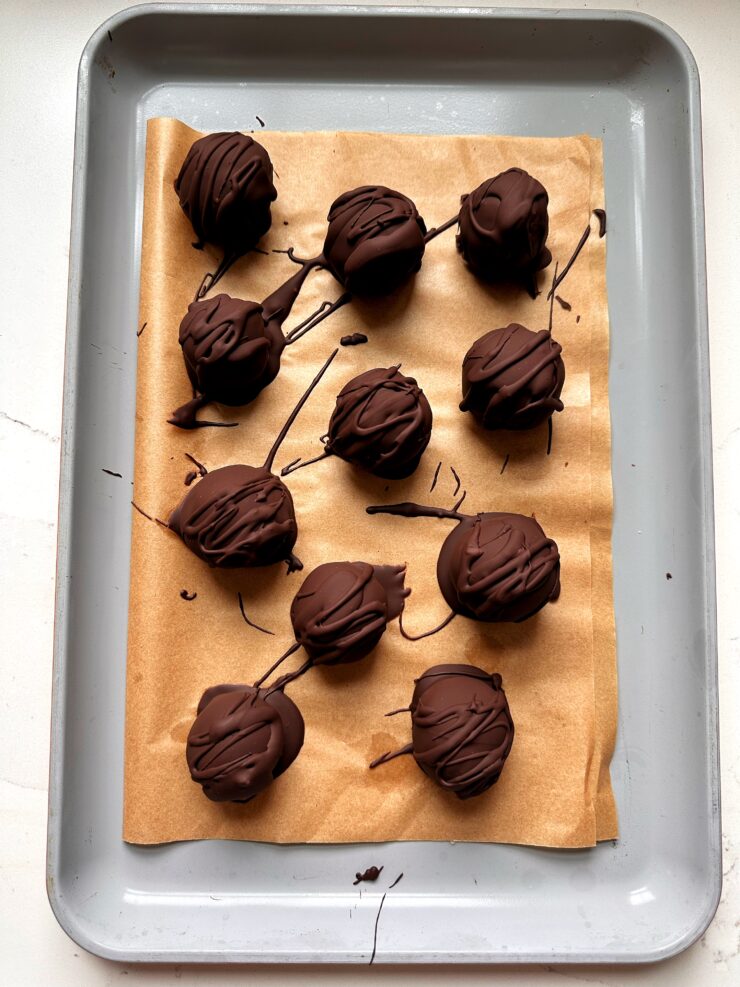
- Take the truffles out of the freezer and dip each one into the melted chocolate using a fork or spoon. Let any excess drip off, then place back on the parchment paper. Sprinkle with flakey sea salt if you’re into that (and I mean… you should be). Let them set for a few minutes until the chocolate is firm.
- Once set, transfer the truffles to a container and store in the fridge for up to 1 week — or freeze them for longer! I love keeping a stash in the freezer for whenever that chocolate-peanut butter craving hits.
How to Store Them
Once they’ve set, transfer your brownie batter truffles to a sealed container.
-
Fridge: Keep in the fridge for up to a week. They’ll stay soft and fudgy and make the perfect grab-and-go snack.
-
Freezer: You can totally freeze them! They’ll last up to 2 months in a freezer-safe container. I like eating them straight from the freezer—cold and chewy like a brownie bite dream.
Tips + Variations
If you’ve got a few minutes to experiment, here are some ideas for switching it up:
-
Add mini chocolate chips into the dough for extra chocolate texture.
-
Swirl in crushed nuts or seeds for crunch.
-
Use flavored nut butters (hello cinnamon almond butter or chocolate hazelnut spread) for different vibes.
-
Roll them in crushed freeze-dried strawberries or coconut flakes before the chocolate sets for a fun twist.
-
Skip the chocolate coating if you’re in a rush—they’re delicious either way!
Why Cottage Cheese Works So Well Here
Okay, I know some people get a little weird about cottage cheese—but trust me when I say this recipe will turn you into a believer. It blends right in, gives the truffles a creamy, rich texture, and adds sneaky protein without needing protein powder.
Cottage cheese has definitely become one of those unsung heroes in my kitchen lately. It’s affordable, versatile, and can be used in so many sweet or savory recipes—like these truffles, pancakes, smoothies, or even blended into sauces. If you’ve been hesitant to try it, this is your moment.
These Brownie Batter Cottage Cheese Truffles are the kind of recipe that makes you feel like a total genius in the kitchen. They taste indulgent and bakery-worthy, but they’re made with wholesome, real ingredients you probably already have at home.
They’re the perfect mix of nourishing and satisfying—something you can feel good about sharing with your kids orkeeping all to yourself (no judgment). And they check all the boxes for me: easy, freezer-friendly, chocolatey, protein-packed, and just downright delicious.
So grab that food processor, toss in those ingredients, and give this recipe a go. I have a feeling you’re going to be just as obsessed as we are.
And if you make them, tag me so I can see your creations! Can’t wait for you to fall in love with these little brownie bites of heaven 💕
A Few Other No-Bake Desserts:
Chocolate Chip Cookie Dough Bark (vegan + gluten-free)
Peanut Butter Cup Cottage Cheese Truffles
5-ingredient Brownie Batter Bark (gluten-free)
PrintBrownie Batter Cottage Cheese Truffles
These Brownie Batter Cottage Cheese Truffles are a dreamy delicious sweet snack made with simple ingredients. You’d never know these are gluten-free, higher in protein and made with cottage cheese.
- Prep Time: 30 mins
- Total Time: 30 mins
Yield: 9–12 truffles 1x
Ingredients
- 3/4 cup almond flour
- 1/2 cup creamy peanut butter
- 1/4 cup cacao powder
- 1/3 cup cottage cheese
- 1/4 cup maple syrup
- 1 teaspoon vanilla extract
- 2/3 cup dark chocolate chips or chocolate of choice
Instructions
- Add the almond flour, peanut butter, cacao powder, cottage cheese, maple syrup, and vanilla to your food processor. Blend everything up until a smooth, creamy dough forms. It should easily roll into balls – if it feels too sticky, add another spoonful of almond flour. If it’s too dry, a drizzle of maple syrup or peanut butter will fix it right up.
- Use a small cookie scoop or tablespoon to form the dough into balls and place them onto a parchment-lined baking sheet or plate.
- Pop them in the freezer for 10 minutes to firm up a bit before coating in chocolate
- While the truffles are chilling, melt your chocolate chips. You can do this in the microwave in 30-second intervals (stirring in between), or over a double boiler on the stove. Add a tiny splash of coconut oil if you want extra glossy chocolate!
- Take the truffles out of the freezer and dip each one into the melted chocolate using a fork or spoon. Let any excess drip off, then place back on the parchment paper. Sprinkle with flakey sea salt if you’re into that (and I mean… you should be). Let them set for a few minutes until the chocolate is firm.
- Once set, transfer the truffles to a container and store in the fridge for up to 1 week — or freeze them for longer! I love keeping a stash in the freezer for whenever that chocolate-peanut butter craving hits.
Notes
*Store truffles in fridge for 5 days or freezer for 2 months
 Share this recipe
Mary
Can you substitute Greek yogurt for cottage cheese?
Rachel Mansfield
if it is thicker, yes!!
Kimberley J Green
Nutrition info?
Rachel Mansfield
slowly but surely adding to my recipes!
Karen
Nutrition Facts
Servings: 12
Amount per serving
Calories 106
% Daily Value*
Total Fat 5.5g 7%
Saturated Fat 1.5g 7%
Cholesterol 0mg 0%
Sodium 34mg 1%
Total Carbohydrate 6.9g 3%
Dietary Fiber 1.2g 4%
Total Sugars 4.2g
Protein 2.9g
Vitamin D 0mcg 0%
Calcium 4mg 0%
Iron 0mg 3%
Potassium 78mg 2%
Lisa Barnes
Almond allergy. What else would work?
Rachel Mansfield
you can use oat flour too. just a smidge less!
Quinn Higham
What are the macros per ball?
Rachel Mansfield
hi we are adding macros into each recipe every week. they will be added soon!
Angela Hartley
How many does this make?
Rachel Mansfield
about 12!
Nicole Danks
Can I use chocolate almond bark
Rachel Mansfield
for what? 🙂
Nicole Danks
Instead of chocolate chips
Rachel Mansfield
it wouldn’t work as that usually doesn’t melt well and it won’t be smooth with the almonds in there.
rebecca blitz
I just had to try these after seeing them on your instagram and they are great. So easy and I feel like they’re healthy for a dessert.