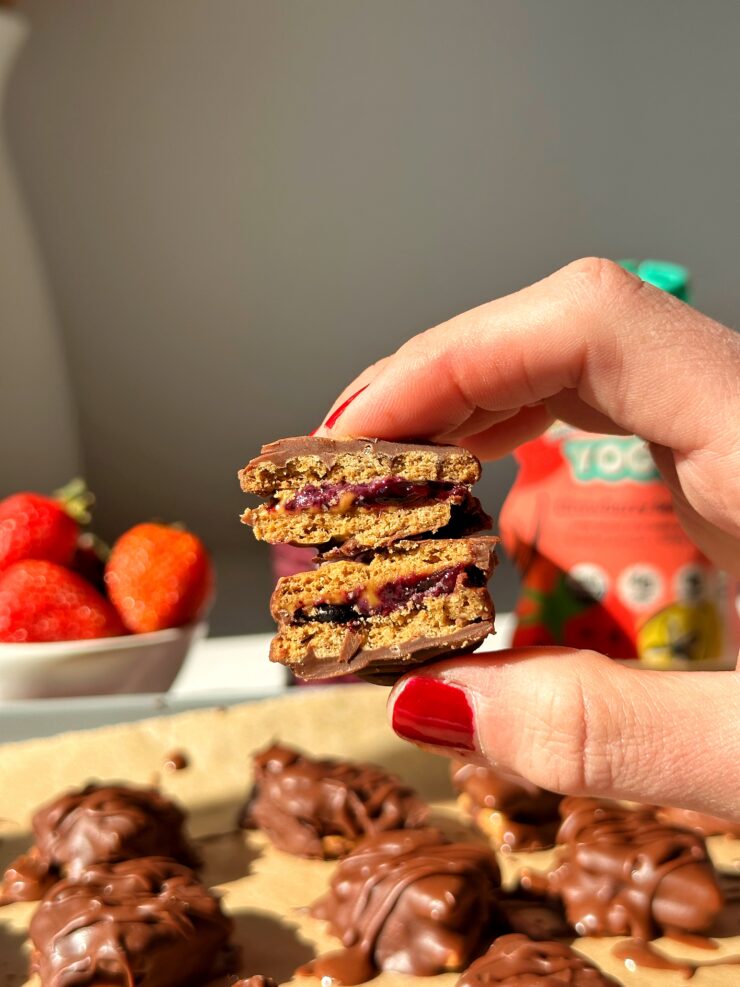
These Chocolate Covered Peanut Butter and Jelly Cookie Sandwiches are the ultimate crunchy dessert snack to make. Made with gluten-free and dairy-free ingredients for an easy and delicious sweet snack with a little salty crunch!
f you love peanut butter and jelly sandwiches and have a sweet spot for chocolate, get ready for your new favorite treat: Chocolate Covered Peanut Butter and Jelly Cookie Sandwiches! This indulgent yet simple recipe takes classic flavors and gives them a dessert-worthy upgrade with a rich chocolate coating. Perfect for an afternoon snack, a fun treat for kids, or even a nostalgic dessert, these cookie sandwiches are easy to make and incredibly satisfying.
Why You’ll Love This Recipe
-
Easy to Make: With just four main ingredients, this recipe is straightforward and requires minimal effort.
-
No-Bake Treat: No need to turn on the oven—just assemble, freeze, and dip in chocolate.
-
Customizable: Use your favorite jam and cookies to make these treats uniquely yours.
-
Perfect Balance of Sweet and Salty: Creamy peanut butter, fruity jam, crunchy cookies, and rich chocolate come together in perfect harmony.
Ingredients
- Small cookies or graham crackers (I used these)
- Creamy peanut butter – or use almond butter if you prefer
- Jam of choice – I made this recipe but this store-bought one is great
- Chocolate chips – add coconut oil as needed to melt!
Instructions
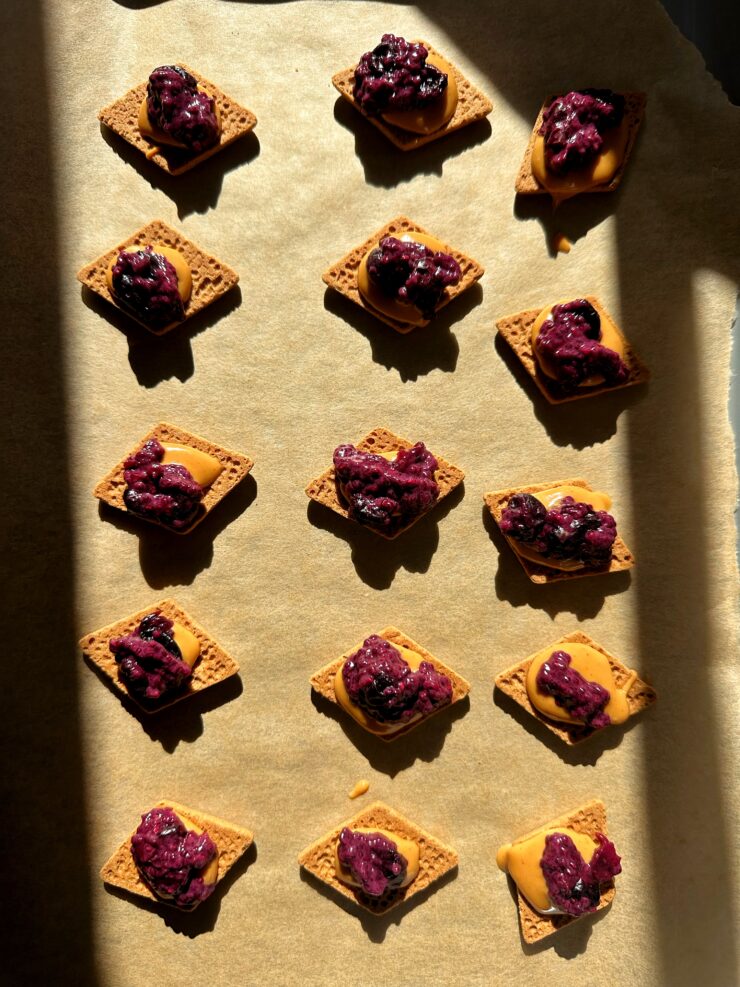
- Line a baking sheet with parchment paper
- Lay 10 cookies across the sheet then add a dollop of peanut butter to each
- Add to freezer to set for a few minutes so it isn’t drippy
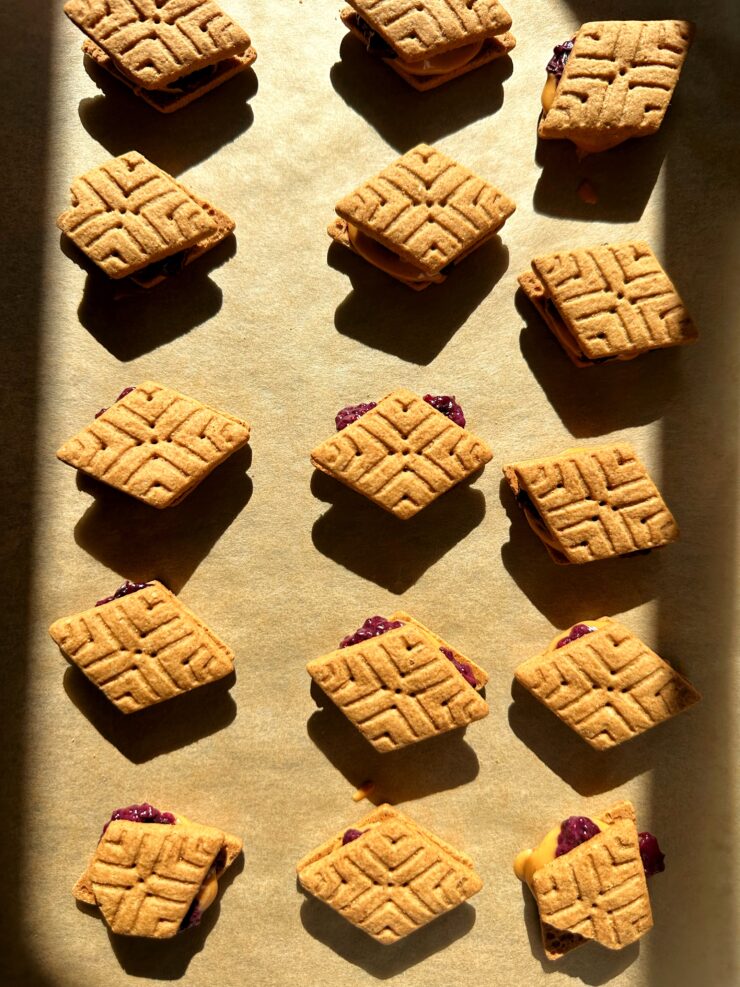
- Next add a dollop of jam to each then another cookie on top to create the “sandwich”
- Freeze for about 15-20 minutes then remove from freezer and gently cover in melted chocolate
- Add bake to baking sheet and place in freezer to set until firm
- Enjoy!

Tips for the Best Chocolate Covered Peanut Butter and Jelly Cookie Sandwiches
-
Choose the Right Cookies: Graham crackers or sturdy cookies work best since they hold up well after being coated in chocolate.
-
Use High-Quality Chocolate: A good-quality chocolate will result in a richer, smoother coating.
-
Experiment with Flavors: Try using almond butter instead of peanut butter or different flavors of jam for variety.
-
Storage: Keep these treats stored in an airtight container in the freezer for up to two weeks. They also taste great straight from the fridge!
Serving Suggestions
-
Enjoy them as a quick dessert or snack.
-
Pair them with a cold glass of milk or a hot cup of coffee.
-
Use them as a fun lunchbox treat for kids.
In Summary..
Chocolate Covered Peanut Butter and Jelly Cookie Sandwiches are a delightful twist on a childhood favorite. With minimal ingredients and effort, you get a delicious treat that’s both nostalgic and indulgent. Whether you’re making them for yourself, your family, or a gathering, they’re guaranteed to be a hit. Give this easy recipe a try, and let us know how you like it!

A few other chocolate snacks to try
No-Bake Chocolate Peanut Butter Snack Bars (vegan + gluten-free)
4-ingredient Chocolate Quinoa Seed Bars (vegan)
EASY 4-ingredient Crunchy Granola Cups
Raspberry Chocolate Yogurt Clusters
PrintChocolate Covered Peanut Butter and Jelly Cookie Sandwiches
These Chocolate Covered Peanut Butter and Jelly Cookie Sandwiches are the ultimate crunchy dessert snack to make. Made with gluten-free and dairy-free ingredients for an easy and delicious sweet snack with a little salty crunch!
- Prep Time: 10 mins
- Total Time: 30 mins
Yield: 10 mini sandwiches 1x
Ingredients
- 20 small cookies or graham crackers (I used these)
- 1/3 cup creamy peanut butter
- 1/3 cup jam of choice (I made this recipe but this store-bought one is great)
- 1 cup chocolate chips, melted (add coconut oil as needed)
Instructions
- Line a baking sheet with parchment paper
- Lay 10 cookies across the sheet then add a dollop of peanut butter to each
- Add to freezer to set for a few minutes so it isn’t drippy
- Next add a dollop of jam to each then another cookie on top to create the “sandwich”
- Freeze for about 15-20 minutes then remove from freezer and gently cover in melted chocolate
- Add bake to baking sheet and place in freezer to set until firm
- Enjoy!
Notes
*Store in fridge for 5 days or freezer for 2 months

 Share this recipe
Rebecca Blitz
How fun are these? My kids and I love them.
Rachel Mansfield
thank you so much!!