These Easy and Delicious Tuna Salad Pinwheels are a must make. They’re a quick and 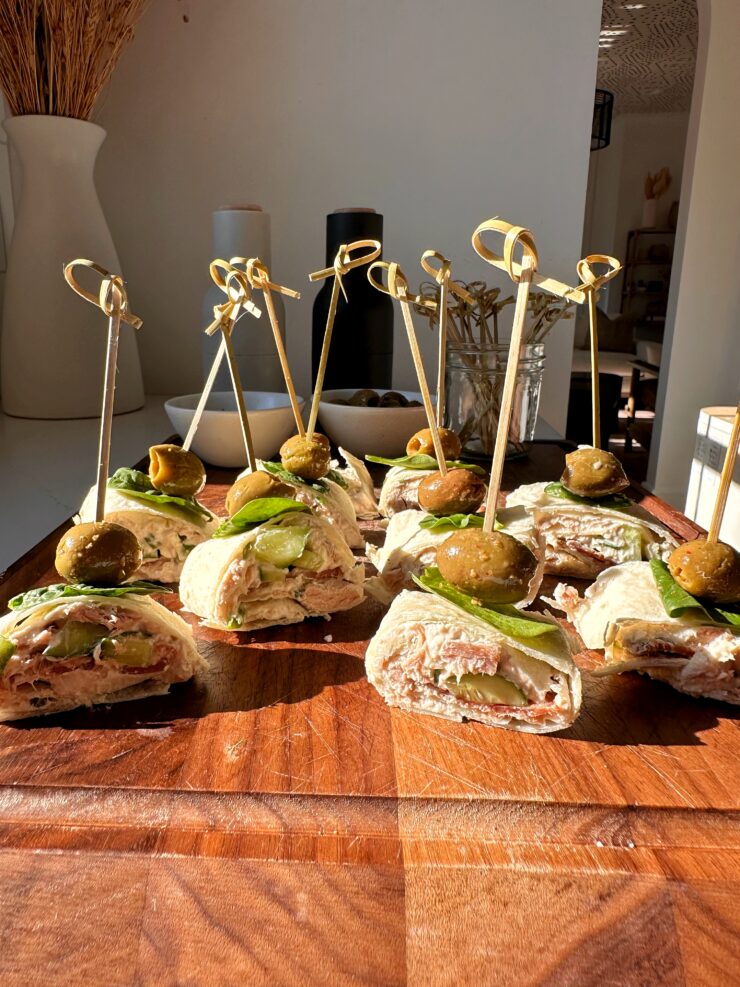 simple appetizer or wrap to make that is a crowd pleaser. Filled with cream cheese, tuna, greek yogurt, bacon and cucumbers – these always hit the spot!
Are you looking for a quick, easy, and satisfying snack or light lunch that’s loaded with protein and flavor? Meet the Tuna Salad Pinwheel! This delicious recipe brings together creamy textures, savory flavors, and a satisfying crunch all rolled into a convenient, bite-sized treat. Tuna salad pinwheels are the ultimate grab-and-go snack, and they’re perfect for school lunches, picnics, or even as party appetizers. Plus, they’re a breeze to prepare, taking less than 20 minutes to make and only requiring a handful of ingredients.
Whether you’re a fan of classic tuna salad or looking to experiment with new variations, this recipe provides a base you can easily customize. Today, let’s walk through the step-by-step process to create these tasty pinwheels and explore a few additional tips for making them even more fun and delicious!
What ingredients you need to make these Tuna Salad Pinwheels:
- English cucumber – Cucumber adds a refreshing crunch to the pinwheels, providing contrast to the creamy and savory filling
- Cream cheese – Cream cheese is the primary ingredient for creating a creamy and rich base for the filling. Its thick texture helps bind the other ingredients together, making it ideal for spreading onto tortillas without making them soggy.
- Greek yogurt – Greek yogurt lightens up the cream cheese mixture, adding creaminess and a bit of tang while providing a healthier, lower-fat option.
- Fresh chives – Chives add a pop of fresh, green color and a mild onion-like flavor that enhances the overall taste without the sharpness of raw onion.
- Wild-caught tuna – Tuna is the star ingredient, adding lean protein and a distinct, savory seafood flavor.
- Cooked bacon – Bacon adds a crispy, savory layer to the pinwheels, balancing the creaminess of the filling with its crunch.
- Gluten-free flour or regular flour tortillas -Tortillas act as the wrap, holding the filling in place and allowing the mixture to be rolled and sliced.
Each ingredient brings a unique texture and flavor to these pinwheels, ensuring that every bite is as tasty as the last. The cream cheese and Greek yogurt create a creamy base, while the fresh chives add a hint of onion-like flavor without overpowering the tuna. The bacon slice adds a delightful crunch and smokiness, and the cucumber provides a fresh crunch that complements the creamy texture of the tuna mixture.
Step-by-Step Instructions:
-
Prepare the Creamy Base
-
- In a medium bowl, add the softened cream cheese, Greek yogurt, and chopped chives. Using a fork or a hand mixer, blend the ingredients until they’re smooth and well combined. This base is what gives the pinwheels their creamy texture and slight tanginess from the Greek yogurt.
-
Add the Tuna
- Once the cream cheese mixture is smooth, add in the drained, flaked tuna. Stir until the tuna is evenly mixed into the creamy base, ensuring every bite has a perfect balance of flavor. Season the mixture with salt and pepper to taste, adding a bit at a time to get the perfect level of seasoning.
-
Assemble the Pinwheels
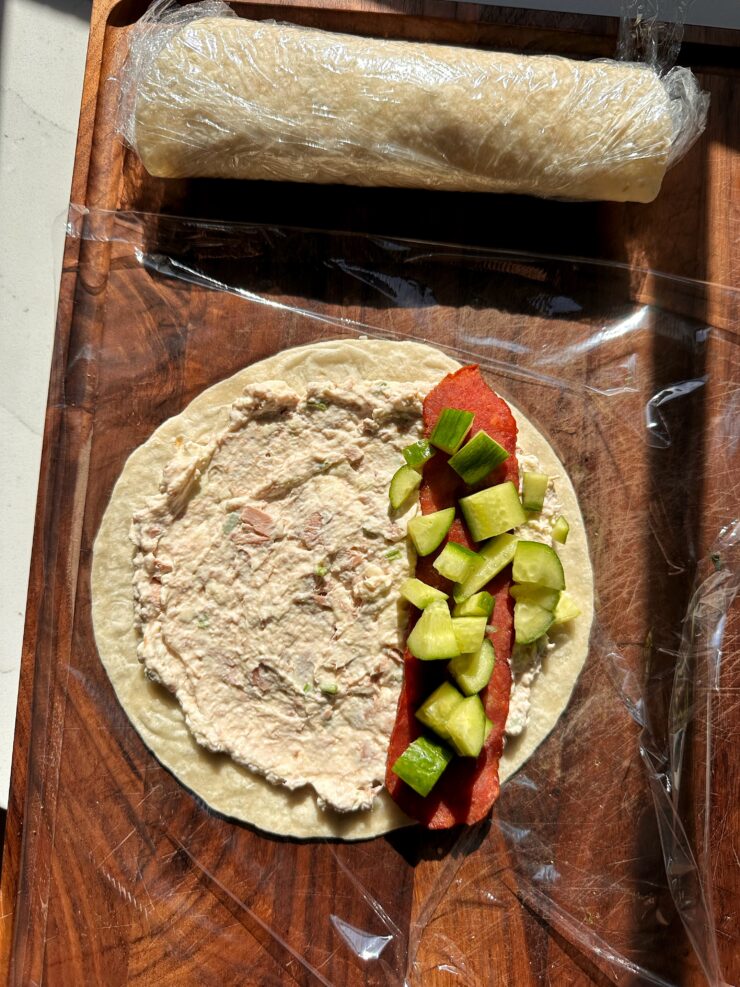
- Lay out one of your tortillas on a flat surface and spread a thin layer of the tuna mixture evenly across the tortilla, leaving a small border around the edges.
- Place one slice of bacon on top of the tuna layer, running it down the center of the tortilla.
- Finally, sprinkle a handful of diced cucumber across the tuna mixture for a refreshing crunch in each bite.
-
Roll and Wrap
- Tightly roll the tortilla up, making sure to keep it as snug as possible without squeezing the filling out. Place the tortilla roll seam side down, then wrap it in plastic wrap to help it hold its shape.
- Repeat this process with the remaining tortillas, tuna mixture, bacon, and cucumber.
-
Chill
- Transfer the wrapped tortilla rolls to the refrigerator to chill for at least 30 minutes, ideally up to an hour. This step helps the flavors meld together and gives the pinwheels a firmer texture, making them easier to slice.
-
Slice and Serve
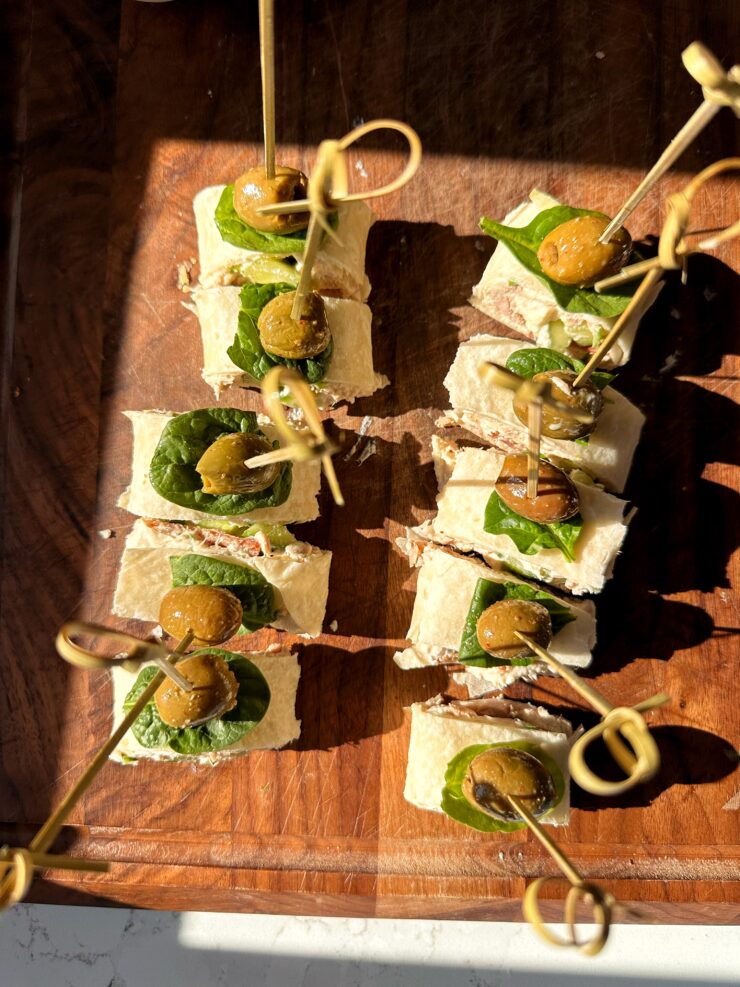
- After chilling, remove the plastic wrap and, using a serrated knife, slice each roll into 1-inch pinwheels. Arrange the pinwheels on a platter, serve, and enjoy!
These pinwheels are best enjoyed within a few hours of making them to ensure freshness, but you can store leftovers in the refrigerator for up to two days.
Variations and Tips for the Best Tuna Salad Pinwheels:
Tuna salad pinwheels are incredibly versatile, and you can easily customize them based on your taste preferences or the ingredients you have on hand. Here are a few tips and variations to try:
1. Experiment with Different Flavors
- Spicy Twist: Add a dash of hot sauce or a pinch of cayenne pepper to the tuna mixture for a kick of heat. You can also add thinly sliced jalapeños for an extra spicy punch.
- Herbed Delight: Swap the chives for fresh dill or parsley for an herb-forward flavor. Dill is especially complementary to tuna.
- Cheesy Goodness: Mix in a handful of shredded cheddar or mozzarella cheese for an even creamier and richer texture.
2. Switch Up the Protein
- If you’re not in the mood for tuna, try substituting canned salmon or shredded rotisserie chicken. The creamy base pairs wonderfully with different proteins, allowing you to create new variations of pinwheels without much extra effort.
3. Play with Texture
- For added crunch, try incorporating other veggies like diced bell peppers, shredded carrots, or thinly sliced radishes. You can even sprinkle some sunflower seeds or chopped almonds for an unexpected crunch.
5. Make it Kid-Friendly
- Kids love these pinwheels, especially when they’re made with fun fillings like mild cheddar cheese or a layer of mashed avocado. Let your little ones help with assembly – they can add their favorite ingredients and enjoy creating their own mini wraps!
6. Perfect for Meal Prep
- Tuna salad pinwheels are great for meal prep. Make a batch on Sunday, wrap them tightly in plastic, and store them in an airtight container. They’ll stay fresh and delicious for a quick snack or lunch throughout the week.
Health Benefits of Tuna Salad Pinwheels:
Not only are these pinwheels delicious, but they’re also packed with nutrients:
- Protein-Packed: Tuna is a great source of lean protein, which keeps you feeling full and satisfied. Greek yogurt also adds extra protein to the creamy base, making these pinwheels even more filling.
- Omega-3 Fatty Acids: Tuna is rich in omega-3 fatty acids, known for their heart-health benefits and anti-inflammatory properties.
- Calcium and Probiotics: Greek yogurt adds calcium and probiotics to this recipe, promoting gut health and bone strength.
- Low in Carbs (Optional): By using low-carb tortillas, you can enjoy this snack even if you’re following a low-carb or keto diet.
Serving Suggestions:
Tuna salad pinwheels can be enjoyed on their own, but they also pair wonderfully with other light sides. Here are a few ideas:
- Fresh Fruit: Serve with a side of fresh fruit like apple slices, grapes, or berries for a sweet contrast.
- Green Salad: Pair with a simple green salad for a well-rounded, light meal.
- Vegetable Sticks and Dip: Serve alongside crunchy vegetable sticks and a dip like hummus or guacamole for extra nutrition.
Tuna salad pinwheels are a fun, easy, and versatile snack or meal that can be adapted to fit any taste. With their creamy filling, fresh crunch from cucumbers, and savory bacon flavor, they’re bound to become a favorite for both kids and adults alike. Whether you’re packing them in a lunchbox, serving them at a party, or enjoying them as a light meal at home, these pinwheels are sure to please.
So, the next time you’re looking for a simple yet tasty recipe to add to your rotation, give these tuna salad pinwheels a try! They’re proof that sometimes, the best recipes are the ones that take the least effort. Happy rolling, slicing, and, most importantly, enjoying!
A few other delicious tuna or chicken salad recipes to enjoy:
Greek Chicken Salad Without Mayo
10-minute Greek-inspired Chickpea Tuna Salad
Easy Thai Chicken Salad (gluten-free)
PrintEasy and Delicious Tuna Salad Pinwheels
These Easy and Delicious Tuna Salad Pinwheels are a must make. They’re a quick and simple appetizer or wrap to make that is a crowd pleaser. Filled with cream cheese, tuna, greek yogurt, bacon and cucumbers – these always hit the spot!
- Prep Time: 10 mins
- Total Time: 1 hour
Yield: Serves 4-6 1x
Ingredients
- 1/2 cup English cucumber, diced (or any seedless cucumber)
- 4 ounces cream cheese, softened
- 1/2 cup greek yogurt
- 1 tablespoons fresh chives, chopped
- 10-ounces wild-caught tuna, well drained
- 4 slices cooked bacon
- 4 large gluten-free flour or regular flour tortillas
Instructions
- Start by adding the cream cheese, greek yogurt, chives to medium bowl and mix together
- Add in the tuna to the mixture and season with salt and pepper to taste
- Spread the tuna filling onto the tortillas then add 1 slice bacon and evenly sprinkle cucumbers on top
- Tightly roll tortilla and place seam side down and cover with plastic wrap
- Repeat with remaining ingredients and add to fridge to chill for 30 minutes to an hour so the flavors meld together and the wraps holy their shape well
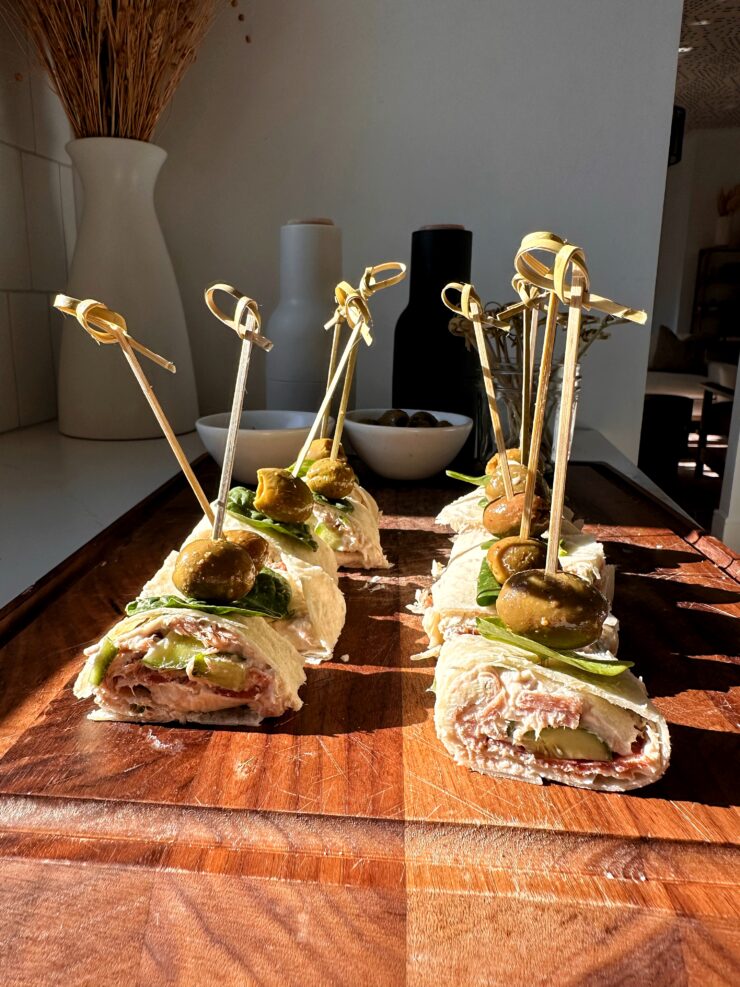
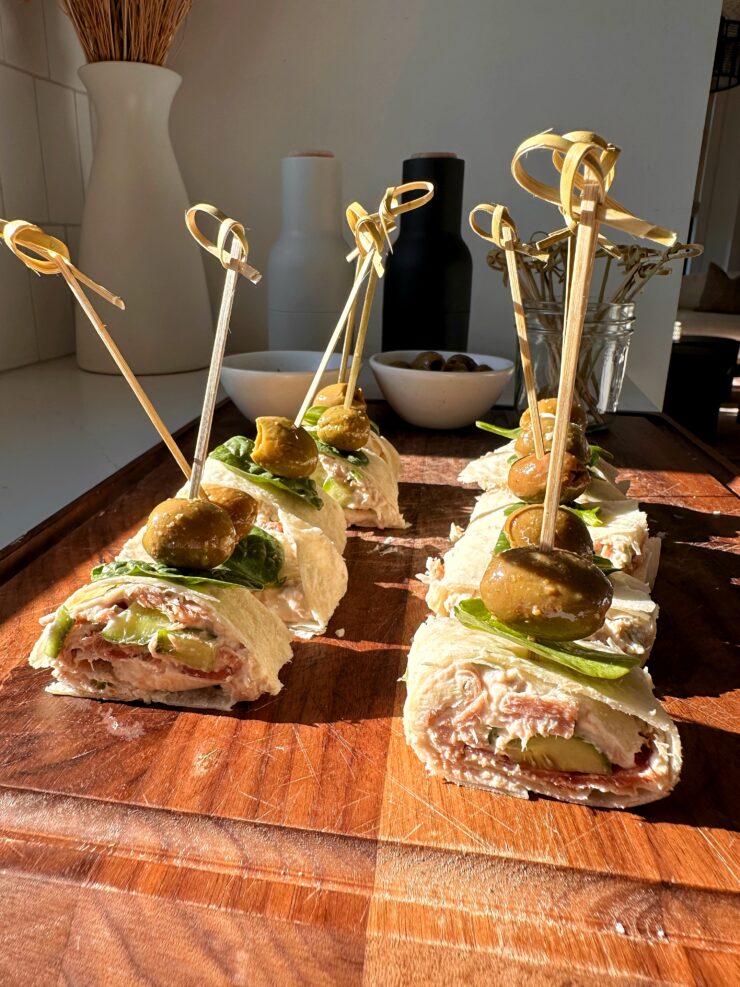
- After chilling, unwrap from plastic wrap and use a serrated knife to cut the tortillas into 1-inch slices and enjoy! I added some basil leaves and pitted olives with a toothpick when we served these, but totally optional!
Notes
*Store leftovers in fridge for 2 days. Best served fresh!
 Share this recipe