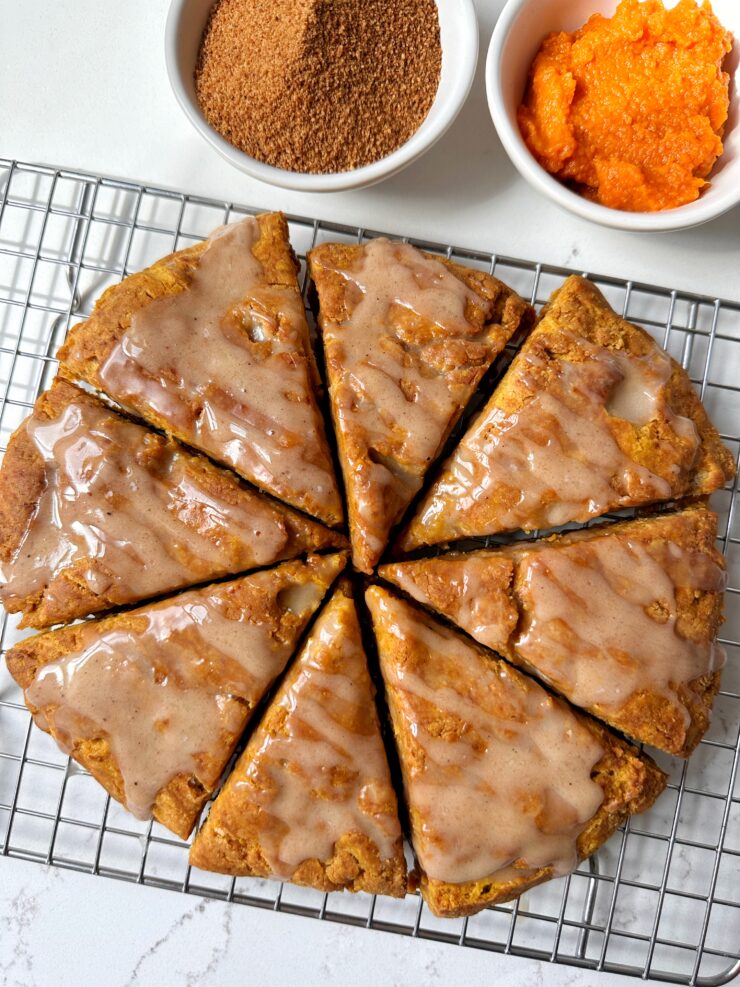
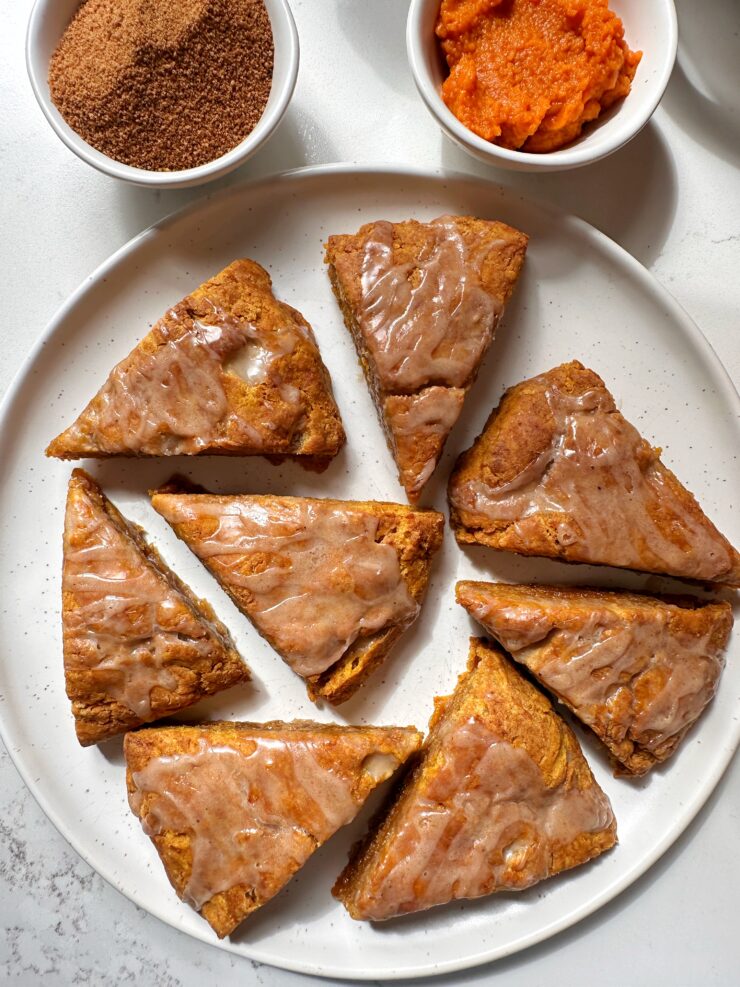
Let’s make delicious Starbucks Pumpkin Scones at home and even more delicious! Plus these are gluten-free, ready in under 30 minutes and are flakey on the outside with a moist buttery center.
Fall is synonymous with cozy sweaters, crisp air, and pumpkin-flavored everything. One of the most iconic flavors of the season is pumpkin spice, and what better way to celebrate autumn than with a batch of gluten-free Starbucks Pumpkin Scones? These scones are the perfect pairing for your morning coffee or afternoon tea and are a wonderful homemade alternative to the popular Starbucks version. Plus, this recipe is gluten-free, making it accessible to more people while keeping all the delicious fall flavors you crave.
Let’s dive into this simple yet scrumptious recipe that’s sure to become a fall favorite!
Why You’ll Love These Pumpkin Scones:
Pumpkin scones bring together everything we love about fall. The warm, spiced flavors, the tender crumb, and the sweet glaze all contribute to a delightful baked treat. Here are a few reasons why this particular recipe is going to be your new go-to:
- Gluten-free goodness: Whether you are gluten intolerant or just trying to reduce your gluten intake, these pumpkin scones allow you to indulge without the gluten.
- Perfect for pumpkin spice lovers: The addition of pumpkin puree and pumpkin pie spice ensures that each bite is filled with seasonal flavors.
- Easy to make: You don’t need to be a professional baker to whip up a batch of these Starbucks-inspired scones at home.
- Healthier than the original: With coconut sugar and coconut milk, these scones are lower in refined sugar and dairy-free, making them a bit healthier without compromising flavor.
Let’s gather the ingredients and get started!
Ingredients You’ll Need:
- Gluten-free flour – Look for a high-quality gluten-free flour blend that works well for baking. The combination of various flours in a blend ensures the best texture for your scones.
- Pumpkin pie spice – The heart of fall flavor! A warm blend of cinnamon, nutmeg, ginger, and cloves.
- Unsalted butter (cold and cut into ½-inch cubes) – The cold butter helps create a flaky texture.
- Coconut sugar – A healthier alternative to white sugar with a caramel-like flavor that pairs beautifully with the pumpkin.
- Full-fat coconut milk – Adds richness and moisture to the scones.
- Canned pumpkin puree – Be sure to use pure pumpkin, not pumpkin pie filling, for the best flavor.
- Vanilla extract – For a touch of sweetness and depth.
- Powdered sugar – This is the base of the glaze and provides sweetness.
Step-by-Step Instructions to Make Your Starbucks Pumpkin Scones:
1. Preheat and Prep
Preheat your oven to 400 degrees F. While the oven is heating, line a baking sheet with parchment paper and set it aside. The parchment paper helps ensure that the scones won’t stick to the pan and makes for easier cleanup.
2. Mix the Dry Ingredients
In a large mixing bowl, whisk together your gluten-free flour, baking powder, pumpkin pie spice, and salt. This dry mixture serves as the foundation of your scones, and the pumpkin pie spice will already start filling your kitchen with warm fall aromas.
3. Cut in the Butter
Next, it’s time to incorporate the butter. Add the cold unsalted butter cubes into the dry mixture. Using a pastry blender (or two forks if you don’t have one), cut the butter into the flour mixture. The goal is to get the butter pieces down to pea-size. This step is crucial for creating the flaky texture that scones are known for.
4. Combine Wet Ingredients
Now, it’s time to bring in the moisture. Add the coconut sugar, coconut milk, pumpkin puree, and vanilla extract to the dry mixture. Gently mix everything together until just combined. Don’t overwork the dough, as you want to keep it light and tender.
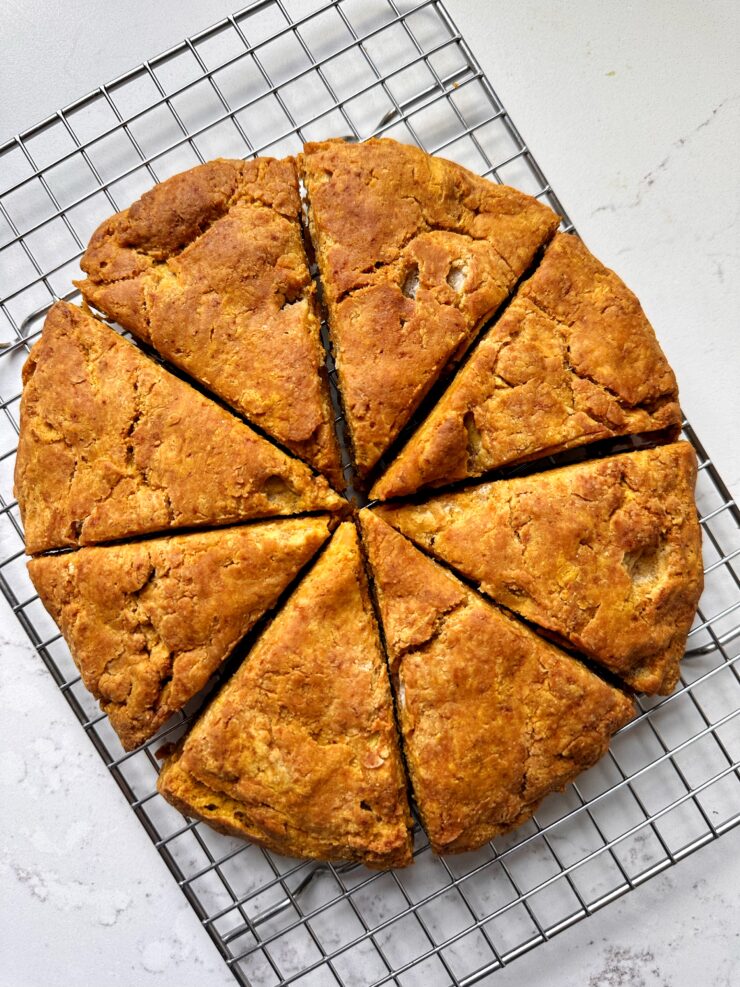
5. Shape the Dough
Transfer the dough onto the prepared baking sheet. Use your hands to shape it into a round disc about ¾-inch thick. Then, using a sharp knife, cut the disc into even-sized wedges (typically 8). Space them out a little on the baking sheet so they have room to rise and bake evenly.
6. Bake the Scones
Place the baking sheet in the preheated oven and bake for about 18-20 minutes, or until the scones are slightly golden brown. Keep an eye on them to ensure they don’t overbake, as you want them to remain soft and tender inside.
7. Cool the Scones
Once the scones are baked, remove them from the oven and let them cool on the baking sheet for about 5-10 minutes. This cooling period allows them to firm up a bit, making them easier to handle before glazing.
8. Make the Glaze
While your scones are cooling, it’s time to make the glaze. In a small bowl, whisk together powdered sugar and pumpkin pie spice. Slowly add the coconut milk, one tablespoon at a time, until you reach a drizzling consistency. If the glaze seems too thick, add a little more coconut milk. If it’s too thin, add a bit more powdered sugar.
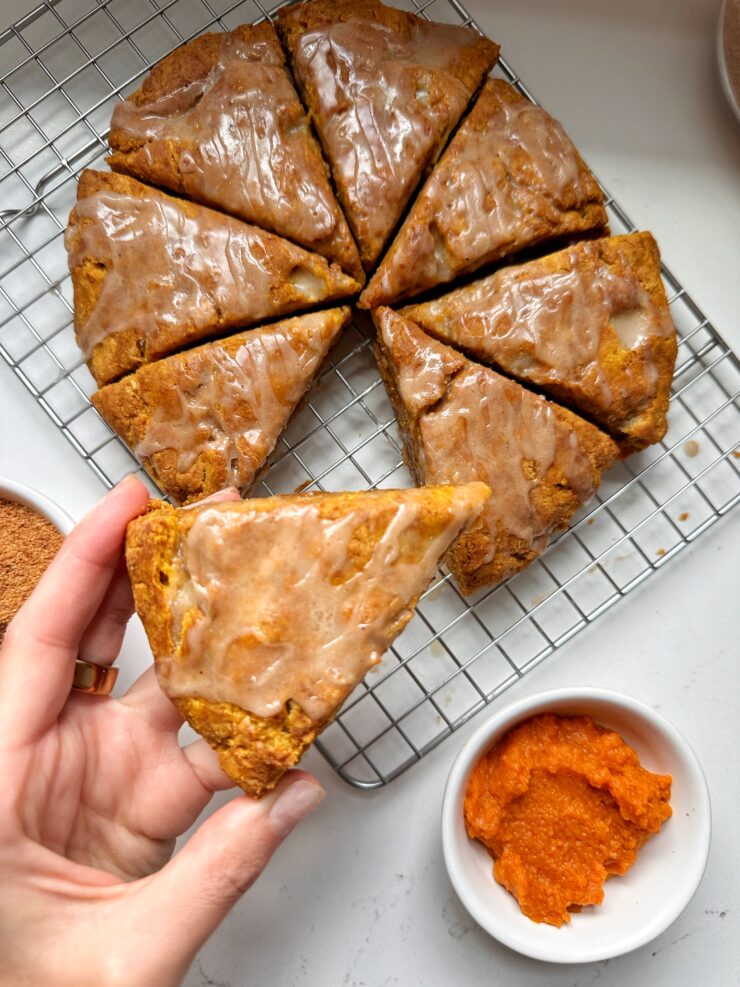
9. Glaze and Serve
Drizzle the glaze over the cooled scones, using a spoon or piping it from a zip-top bag with a corner snipped off. Let the glaze set for about 5 minutes, then your scones are ready to enjoy!
Tips for Perfect Gluten-Free Pumpkin Scones:
-
Use Cold Butter: Cold butter is key to getting that perfect crumbly texture in your scones. The small chunks of butter create air pockets as they melt in the oven, resulting in flaky layers.
-
Don’t Overmix: Once you add the wet ingredients, mix the dough just until combined. Overmixing can lead to tough scones instead of tender, flaky ones.
-
Customize Your Glaze: While this recipe uses a simple powdered sugar glaze, you can get creative with it. Add a dash of cinnamon or even a splash of maple syrup to the glaze for extra flavor.
-
Storage: Store the scones in an airtight container at room temperature for up to two days, or freeze them if you want to enjoy them later.
Enjoy Your Homemade Starbucks Pumpkin Scones!
These gluten-free pumpkin scones are the perfect way to bring the fall flavors of Starbucks into your home. They’re soft, slightly crumbly, and topped with a deliciously sweet glaze. Whether you’re enjoying one with a cup of hot coffee on a crisp autumn morning or serving them at a fall gathering, these scones are sure to be a hit.
By making them at home, you can control the ingredients and enjoy a healthier, gluten-free version of this seasonal favorite. Happy baking!
A few other delicious pumpkin recipes to try:
Irresistible Chocolate Chip Pumpkin Blondies
The BEST Pumpkin Crisp Recipe (gluten-free)
Brown Butter Maple Pumpkin Bread (gluten-free)
Starbucks Cream Cheese Muffins
PrintStarbucks Pumpkin Scones (gluten-free copycat version)
Let’s make delicious Starbucks Pumpkin Scones at home and even more delicious! Plus these are gluten-free, ready in under 30 minutes and are flakey on the outside with a moist buttery center.
- Prep Time: 10 mins
- Cook Time: 20 mins
- Total Time: 30 mins
Yield: 8 scones 1x
Ingredients
Scones:
- 2 cups gluten-free all purpose flour
- 2 teaspoons baking powder
- 1 teaspoon pumpkin pie spice
- ¼ teaspoon salt
- ½ cup unsalted butter cold and cut into 1/2 inch cubes
- ½ cup coconut sugar
- ½ cup full-fat coconut milk
- ½ cup canned pumpkin puree
- ½ teaspoon vanilla extract
For the glaze:
- ½ cup powdered sugar
- ⅛ teaspoon pumpkin pie spice
- 1 tablespoon coconut milk
Instructions
- Preheat oven to 400 degrees F and line a baking sheet with parchment paper and set aside.
- In a large bowl, whisk together the flour, baking powder, pumpkin pie spice, and salt together.
- Using a pastry blender (or two forks), cut in the cubes of butter until the mixture comes together and is crumbly.
- Next add in the coconut sugar, coconut milk, pumpkin puree, and vanilla extract and mix into the dry ingredients until combined.
Transfer dough onto lined baking sheet and use your hands to form into a round disc. - Use a sharp knife to cut into even-sized wedges.
- Bake for 18-20 minutes or until scones are slightly browned.
- Allow the scones to cool on the baking sheet for 5-10 minutes.
Combine the powdered sugar and pumpkin pie spice in a small bowl. Add the milk, one tablespoon at a time, until the glaze reaches a drizzling consistency. - Drizzle over cooled scones and allow glaze to set for 5 minutes before serving.
Notes
*Store in airtight container for 3 days, 5 days in fridge or freezer for 2 months

 Share this recipe