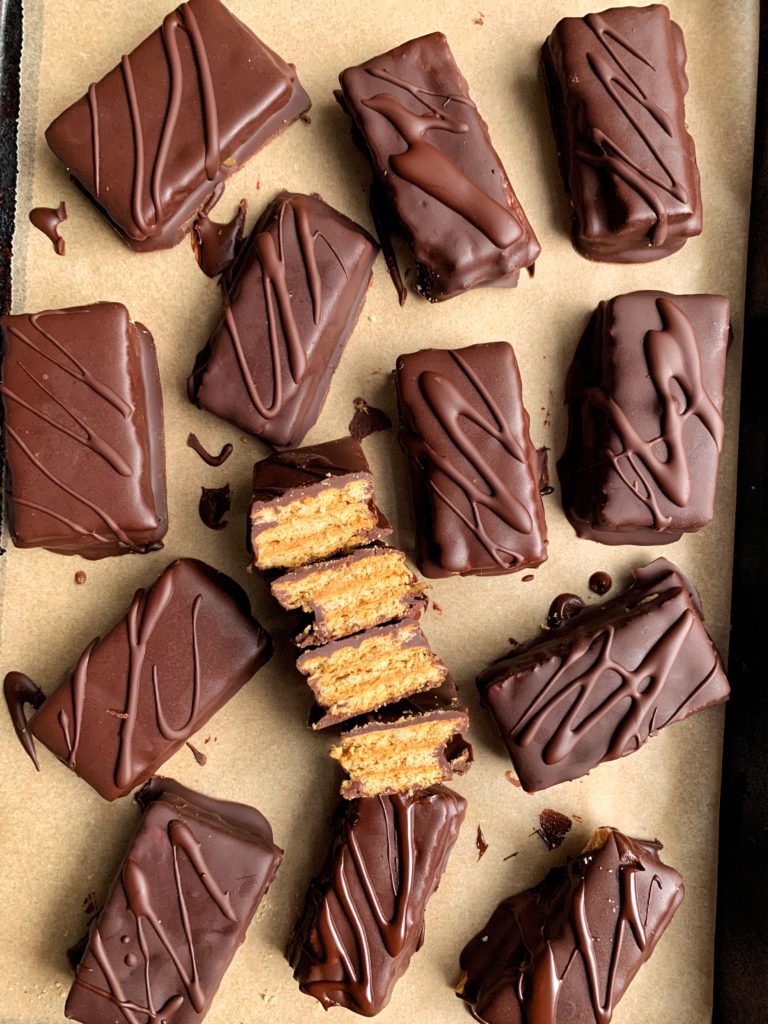
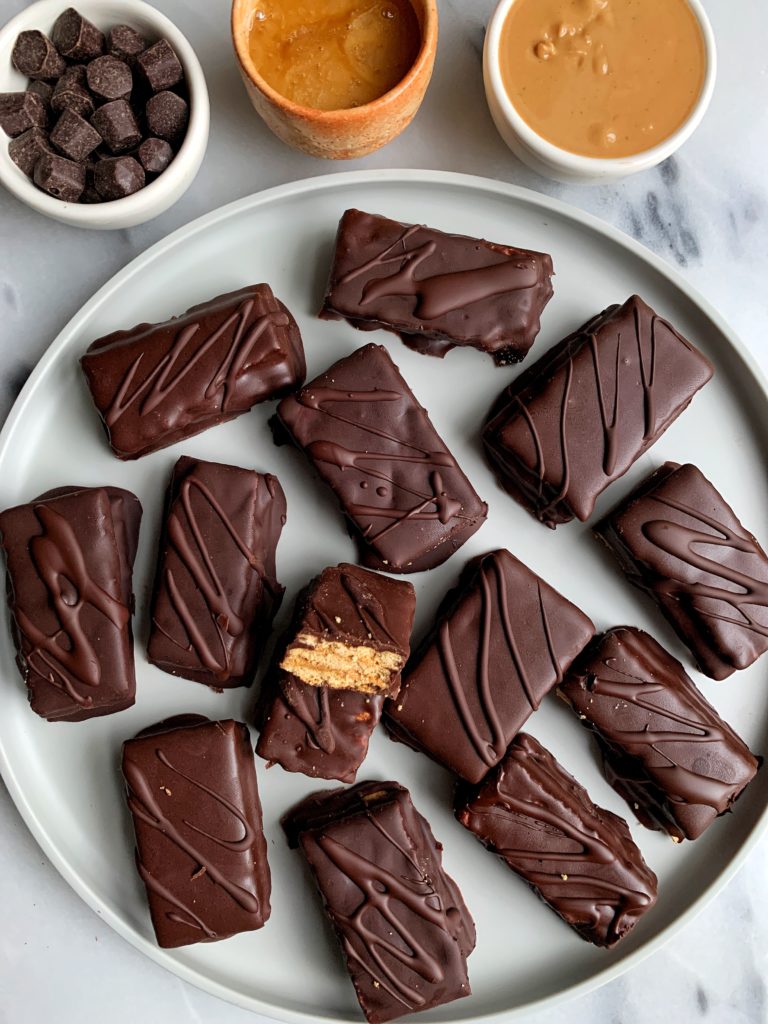
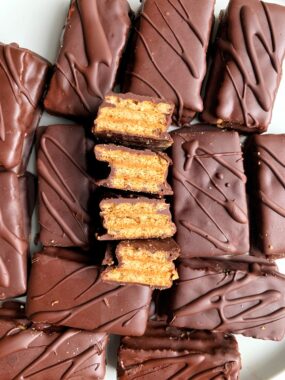
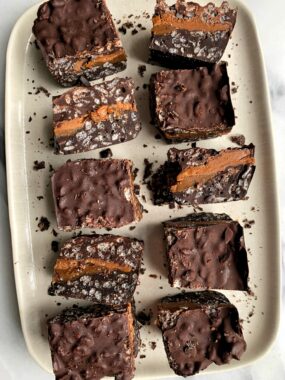
A healthier twist on a favorite candy! These homemade Kit Kat Bars are made with only 4 ingredients and they have the most insane crunch. Filled with a delicious peanut buttery flavor and covered with a dark chocolate shell.
Kit Kats always remind me of my younger brother. On Halloween every year, we’d always trade candy to give each other our favorites. TBH I love all candy so I wasn’t too particular. But Seth has a nut allergy so he always wanted to have the plain Hershey’s bars, Crunch Bars (gotta make those soon) and Kit Kats.
Today is the day – we are finally making homemade Kit Kats for us to enjoy. I love how easy this is to make and you only need 4 simple ingredients to make them. Can it get an easier? Probably not.
I love storing mine in the freezer for a crunchier snack of sorts. But you can keep them in either the fridge or freezer.

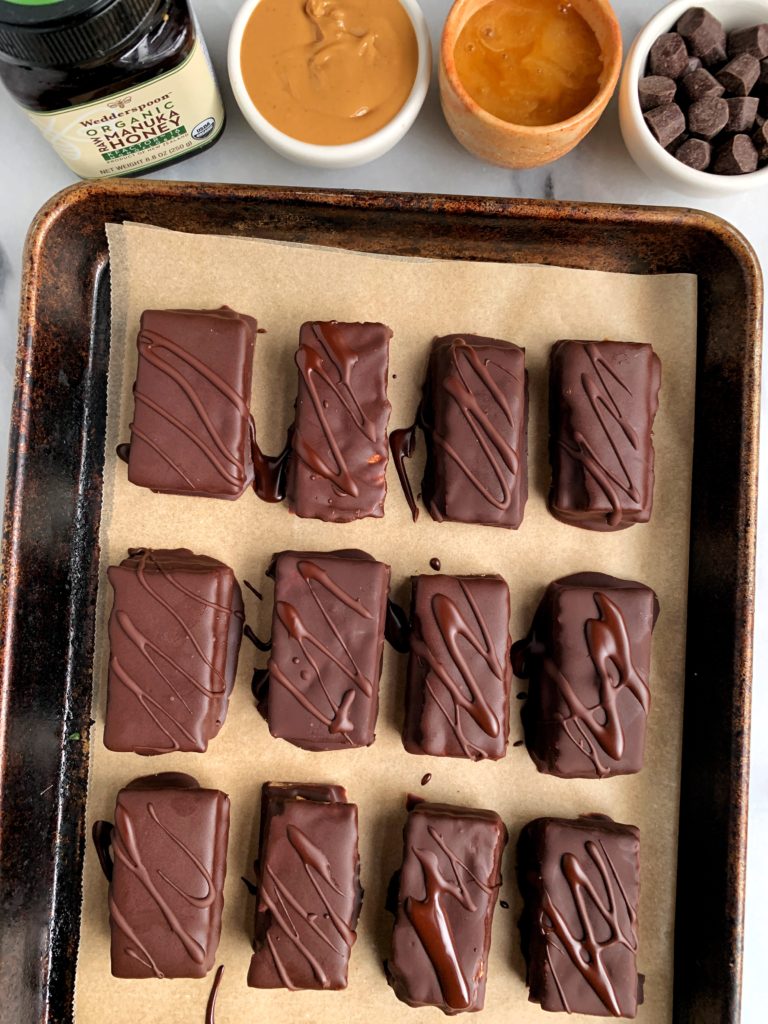
Kit Kat ingredients:
Here is an overview on the 4 ingredients you’l need to make this recipe. It is so simple and easy, I don’t know what took me so long to whip these up.
- Graham crackers – store bought or you can make my grain-free ones
- Creamy peanut butter – or any nut butter
- Wedderspoon Organic Manuka Honey – truly such a staple sugar option in my pantry. You guys know I use Wedderspoon’s products for everything and their new Organic Manuka is the absolute best. It is the highest quality, sourced responsibly and the sweetness is perfect. It adds the best sweetness to this recipe and helps the Kit Kat stick together. You can use the code RACHL for 25% off your order.
- Dark chocolate – I always use this one! Code RACHL for free shipping.
How to make healthy Kit Kat Bars:
- Slice each graham cracker in half (if using rectangle shape) then slice into 1 more half. Creating 4 smaller rectangles per graham cracker sleeve
- Repeat this for all the graham crackers
- Spread a layer of honey on 1 piece of graham cracker then add another piece on top and spread peanut butter and gently press down so the 3 pieces stick together
- Add to a lined baking sheet, tray or plate and repeat for remaining graham crackers
- Add to fridge to set for a few and begin melting chocolate in microwave or in saucepan
- Gently dip each kit kat into the chocolate to coat completely then add to tray
- Drizzle any extra chocolate on top then add to fridge to set for an hour or so and enjoy!
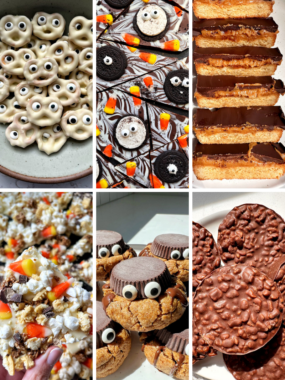
For all of my favorite healthy candy recipes head on over to this blog post!
A few of my other favorite homemade candy recipes made healthier:
Healthier Copycat Butterfingers (gluten-free)
Healthier Copycat Reese’s Eggs (vegan + gluten-free)
Homemade Paleo Dark Chocolate Twix Bars
5-ingredient Copycat Peanut Butter M&Ms (gluten-free)
PrintHealthy Homemade Kit Kat Bars (paleo)
A healthier twist on a favorite candy! These homemade Kit Kat Bars are made with only 4 ingredients and they have the most insane crunch. Filled with a delicious peanut buttery flavor and covered with a dark chocolate shell.
- Prep Time: 10 mins
- Cook Time: 1 hour in fridge
- Total Time: 3 minute
Ingredients
- 10 full sleeves/rectangles of graham crackers (or about 20 graham cracker squares – you can do store bought or make my grain-free ones from Just the Good Stuff)
- 1/3 cup creamy peanut butter (or any nut butter)
- 1/4 cup Wedderspoon Organic Manuka Honey (code RACHL for 25% off your order)
- 1 cup dark chocolate chips (code RACHL for free shipping)
Instructions
- Slice each graham cracker in half (if using rectangle shape) then slice into 1 more half. Creating 4 smaller rectangles per graham cracker sleeve
- Repeat this for all the graham crackers
- Spread a layer of honey on 1 piece of graham cracker then add another piece on top and spread peanut butter and gently press down so the 3 pieces stick together
- Add to a lined baking sheet, tray or plate and repeat for remaining graham crackers
- Add to fridge to set for a few and begin melting chocolate in microwave or in saucepan
- Gently dip each kit kat into the chocolate to coat completely then add to tray
- Drizzle any extra chocolate on top then add to fridge to set for an hour or so and enjoy!
Notes
*Store in fridge for 5 days or freezer for months
Thank you Wedderspoon for partnering with me for this blog post!
 Share this recipe


Eryn
★★★★
I made these today, and they weren’t what I’d call a Kit Kat bar, but it is a delicious chocolate covered cookie! Also, i wasn’t able to dip these in chocolate without them falling apart. I ended up pouring chocolate over the cookies and then spooned it on the remaining pieces, much easier than dipping. Fun for Halloween and the fall.
Mia
Delicious! I love KitKats and these hit the spot.